17 Results

air max

Search

Staring out of windows is believed to have a therapeutic effect on our minds. A great window on one of the walls lets you enjoy a pleasing view, be it of the snowfall, a sudden downpour, a shooting star, the dazzling night sky, the sea waves, or a regular thoroughfare. Apart from the relaxation effect that a bay window offers, it also allows an ample amount of sunlight and fresh air to enter your apartment.

Bay windows are also beneficial for claustrophobics. Besides this, bay windows raise the resale value of your property. While having a bay window in your living room is incredible, it is even more essential to have outstanding decorations around it. Whether you have an apartment with a bay window or you have built a house with a bay window on the topmost floor, we have got you covered with one of our decoration ideas to make a lasting impression.

So, if you are looking for decorative bay window ideas, reading this article would help you spot and plan some awesome decorations for your bay window.

What is a Bay Window?

A three-sectioned glass window design juts out of the building wall to form a compartment or bay-like area inside the room. These are large windows that usually don’t extend to the floor. They generally have various shapes like trapezoid and polygonal, and they even come in rectangular shapes.

Bay windows became popular during the English Renaissance period, but even to this day, their prominence hasn’t been reduced in building architecture. During the Victorian era, bay windows became a regular feature of newly built homes. In Germany, bay windows supported by a bracket are known as oriel windows. The use of bay windows is also seen during the Gothic and Medieval era.

However, in a 2012 study, it was found that bay windows were a characteristic feature of San Francisco architecture.

Bay Windows Ideas and Decoration Tips

Windows are the soul of your house. So, here are some interesting suggestions for bay window decorating ideas.

1. Add Window Seating Options

Add Window Seating Options

If your bay window is in your living room, it can be your bae forever. But to spend quality time with your bae, you need to add some comfortable seating options. It could include two or three oversized accent chairs. Throw some cushions and pillows.

Recliners and a set of couches would also look great in front of the bay window. A carpet on the floor and some green friends around will further complement your bay window. This area would be amazing for having long conversations and growing old with your loved ones.

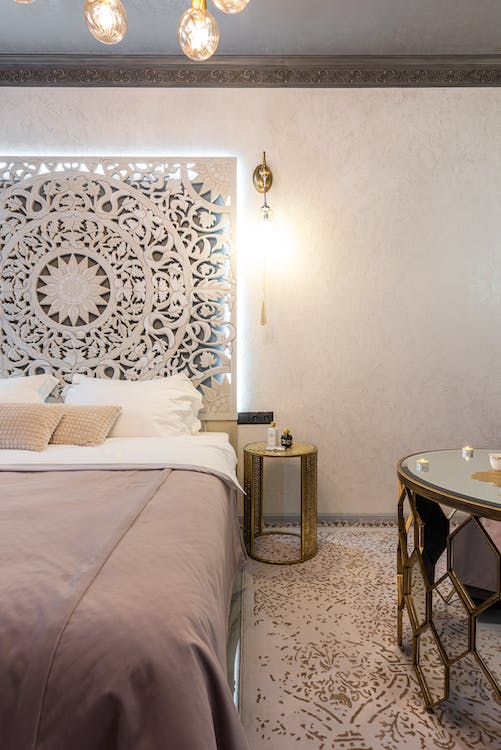
2. Set Up a Lounge Area

Set Up a Lounge Area

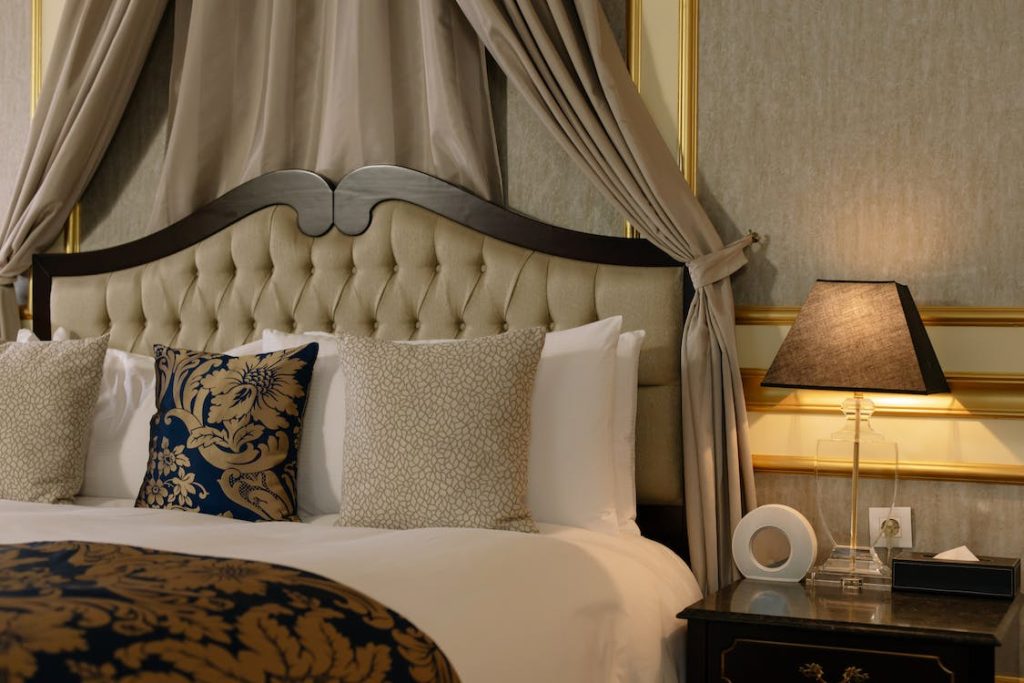
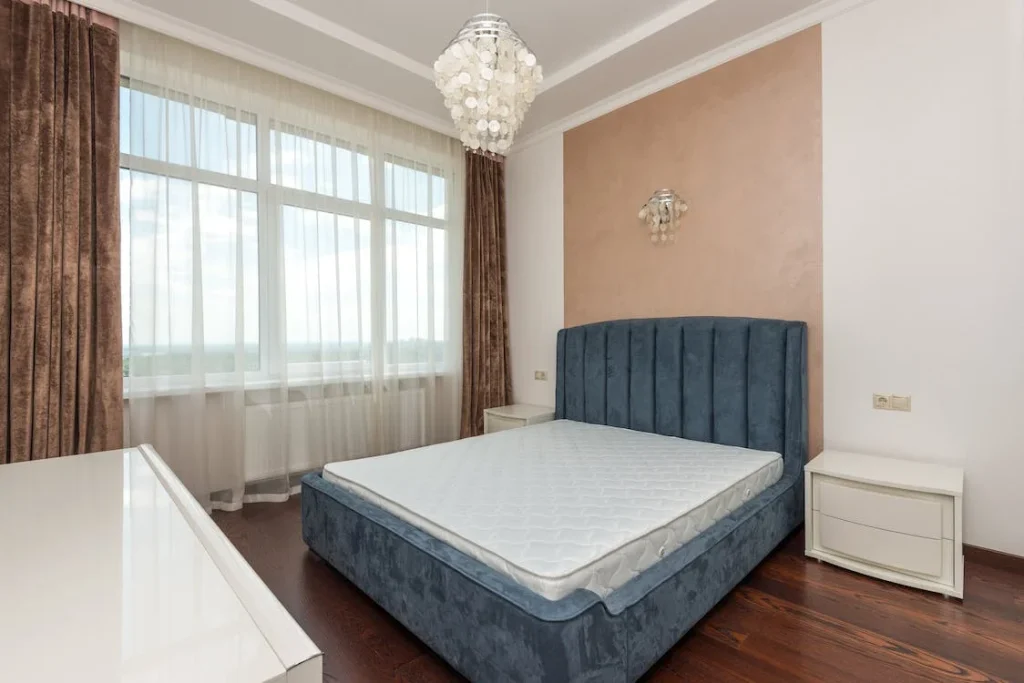
Having a bay window in the bedroom would be a blessing. You could set up the bed against the window wall. Line the bed with fluffy pillows, and you will be all set for an amazing slumber.

During weekends, the spot would be ideal for catching a quick nap too. Furthermore, you can do a movie marathon sitting by the bay window during a long weekend. Roman shades, blinds, patterned window shades, or wooden blinds could be installed to have some privacy in your bedroom.

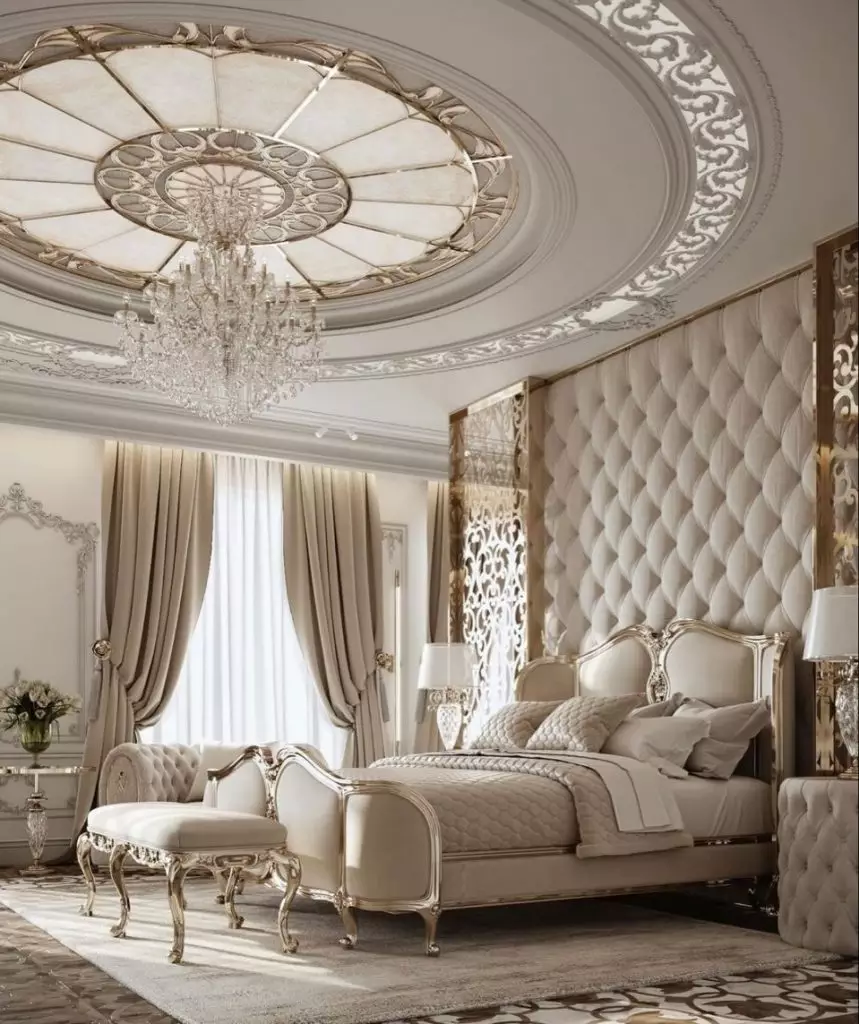
3. Try the Victorian Style

Try the Victorian Style

If you want to recreate one of the Victorian-era bay window styles, you would need to paint your walls and window frames either a tone of grey or royal blue. To complete the look, add vintage style curvy loveseat. Keep the window curtain free to allow natural light to seep into the room till dusk freely.

A grand fireplace at the front or side wall, a center table, and some oil-painted artworks hung on the surrounding walls will perfectly resemble the Victorian era.

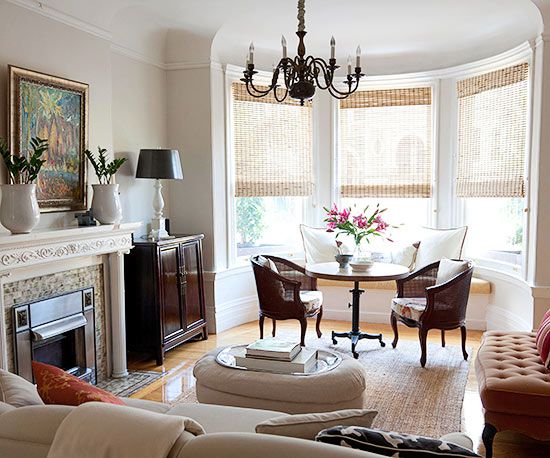
4. Set Up a Dining Area

Set Up a Dining Area

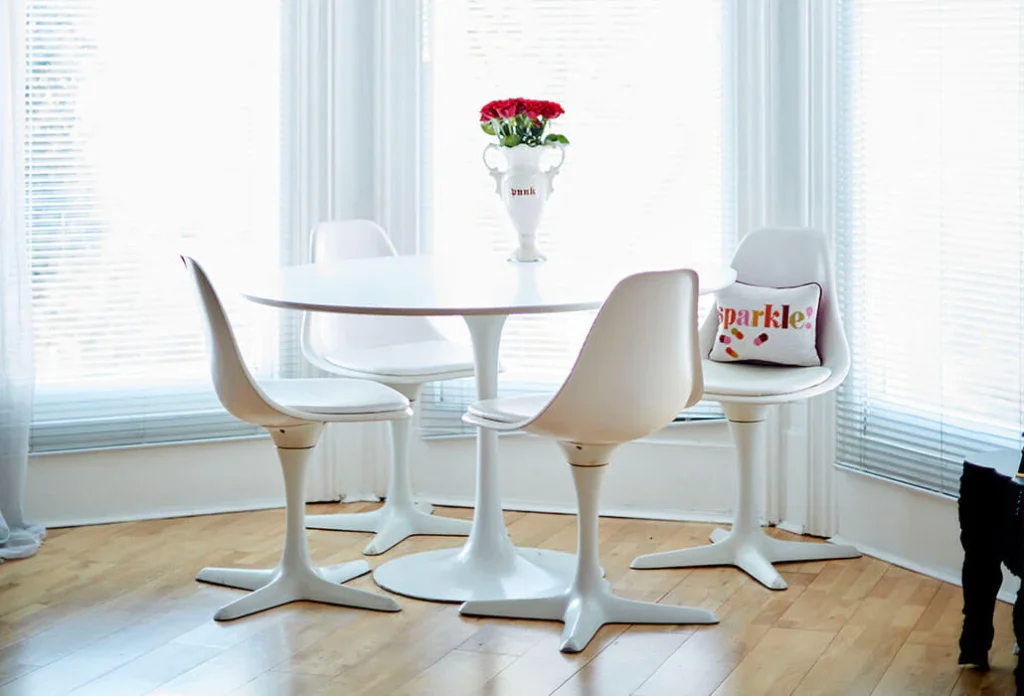
Wouldn’t it be wonderful to have your super while watching the sunset? Whether you want to create a grand banquette or want to set a simple table for two, it will make an excellent bay window idea.

You could opt for a round table or a rectangular one if you are planning to create a banquette. Alternatively, you could only set a tulip table with oval-back dining chairs or parsons chairs. A pendant light hanging above will further complete the look.

5. Set Up a Bar

Set Up a Bar

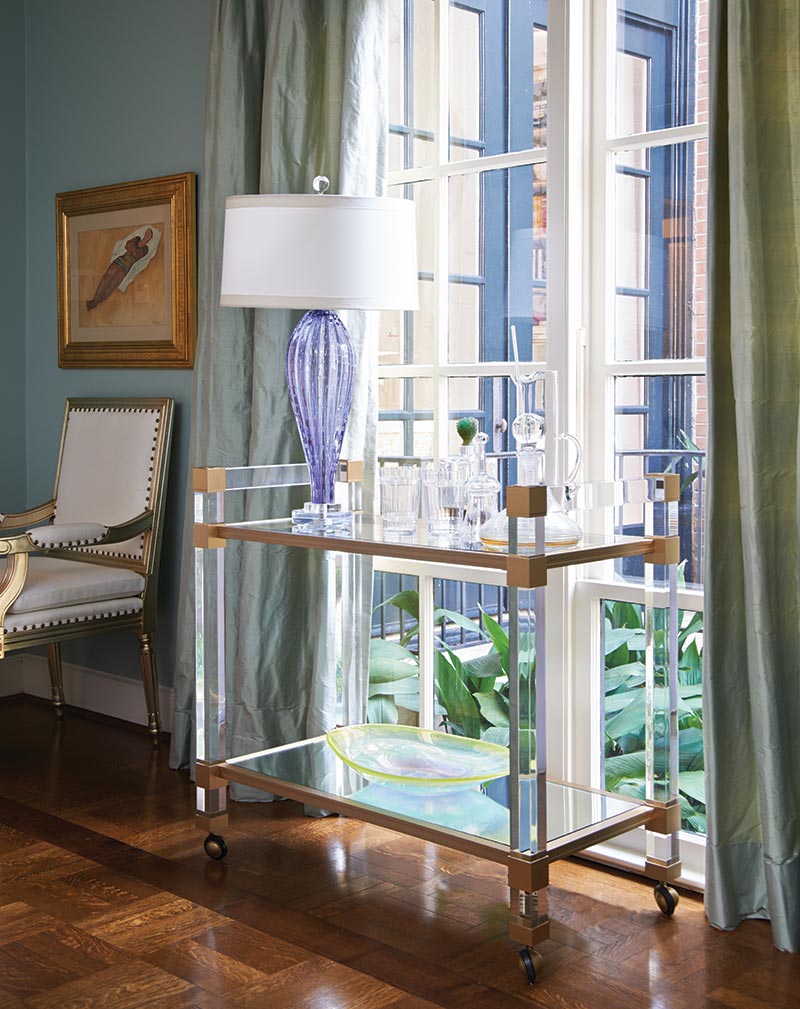
If your bay window is in the kitchen area, an amazing bay window idea is to set up a bar cart. An ordinary bar cart paired with accent chairs and ottoman stools is just what you need to enjoy a drink with your buddies.

A music system installed nearby would be great to set up any kind of mood ranging from that of a party to a subtle romantic one.

6. Create a Workout Zone

Create a Workout Zone

Enthusiastic workouts in front of your bay window can boost your physical fitness. It helps to soak in the freshness of the outdoors without really having to step out into the streets.

Working out has become a necessity of modern life. However, introverts and those who just love being indoors might not always prefer gyms and group yoga classes. So, for such people having a bay window in the house is a boon. With morning light flooding in through the bay window, you could do yoga, run on a treadmill, or even try some Zumba moves.

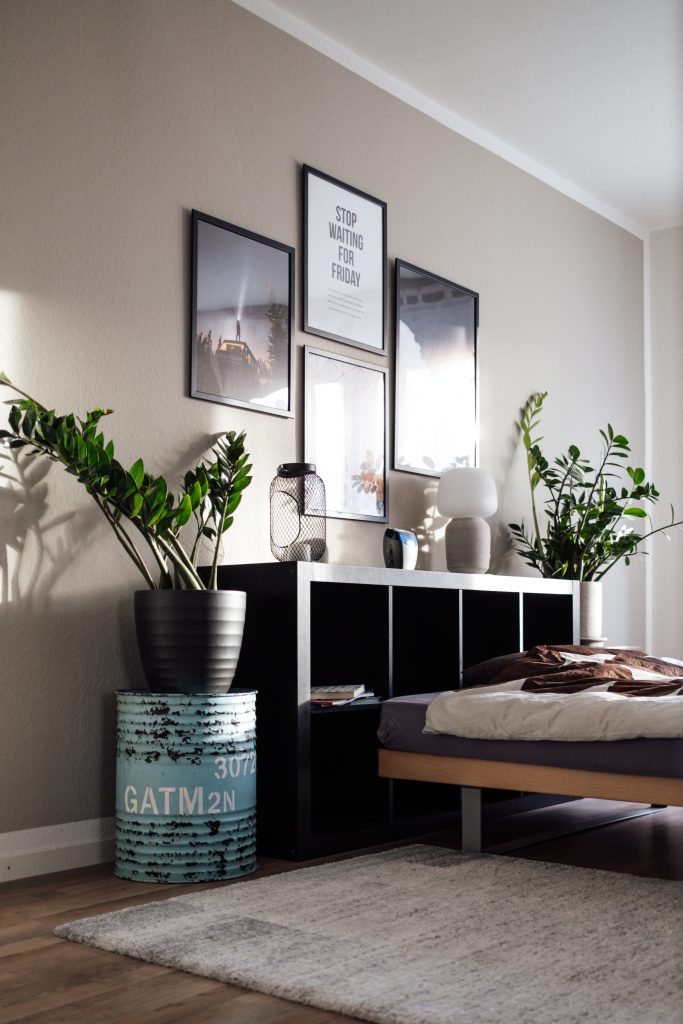
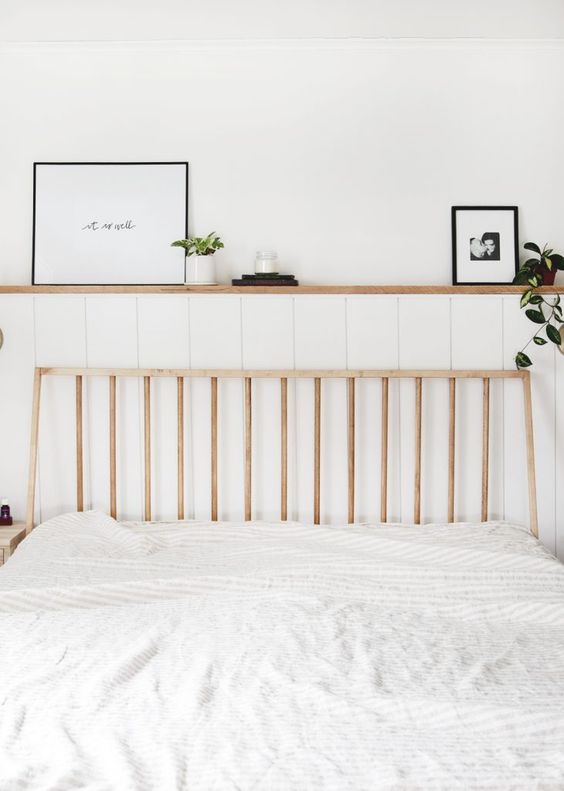
7. Creating a Memory Corner on The Windowsill

Creating a Memory Corner on The Windowsill

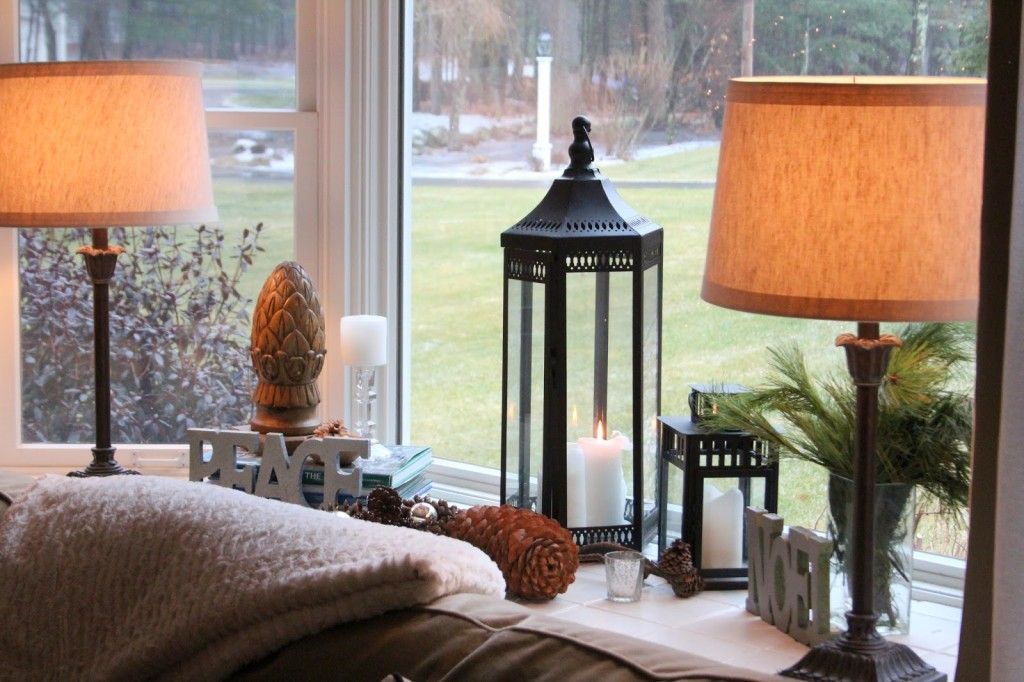
A broad bay windowsill offers an excellent option for displaying your favorite souvenirs. You could place photo frames, some succulents, and even “Secret Santa” gift pieces on the windowsill.

Decorating the floor with plants and hanging some curtains in bold colors would create a special longing for the area. Further, you can hang Christmas stars and even a string of photos from your travel diary on the window.

8. Paint a Feature Wall

Paint a Feature Wall

An accent wall is always the best solution to beat boredom. When one has subtle shades throughout the room, the best way to highlight your bay window is to paint the wall in bold and bright shades that host the window. Alternatively, you could use wallpaper that reflects grandeur.

Painting the wood frame in a white or natural wood shade is also another excellent bay window decoration idea. Some vintage carpet and a chandelier will further add to the charm of the room.

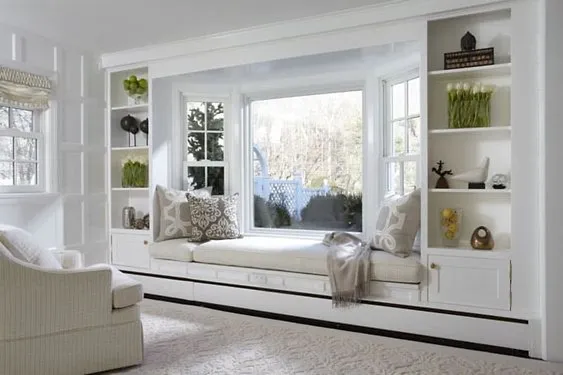
9. Bay Window Library

Bay Window Library

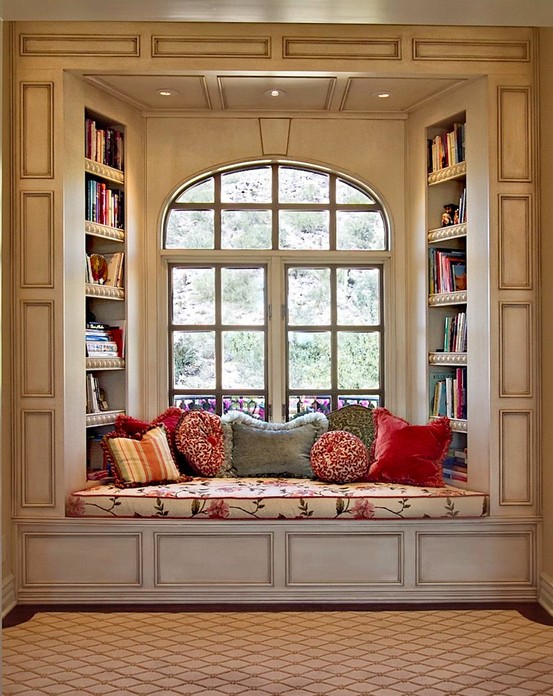
What joy reading a classic book of English Literature or even Tolkien and Harry Potter will bring to the reader who sits by the bay window on a rainy day. So, for bookworms, setting up a mini library by the bay window would be the ideal thing to do.

Half-height bookshelf with seating arrangement or window seat bookcases will make a perfect setup for enjoying your favorite books. A few accent pillows, a floor lamp, and some potted plants around will be thoughtful additions.

10. A Play Corner for Your Kids

A Play Corner for Your Kids

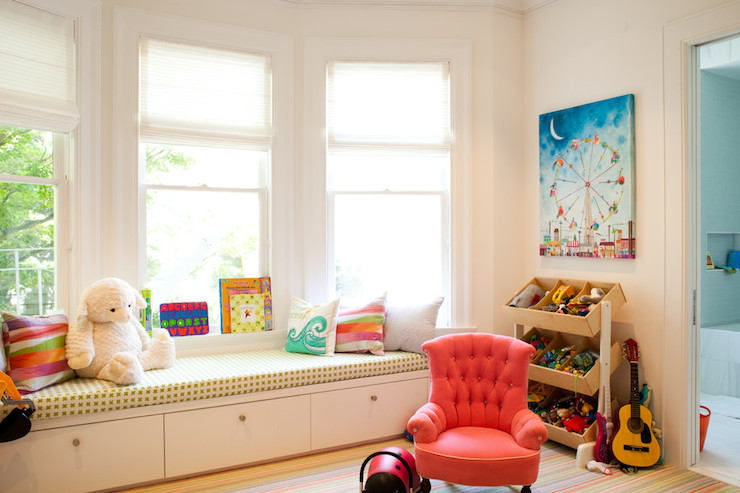
Another interesting bay window idea is to design a play corner by the bay window for your kids.

Some colorful, sturdy curtains to cover the large windows during nap times, a kid-sized bed, lots of pillows, stuffed animals, soft toys, and a fluffy rug will make a perfect play corner for your kids.

You can also paste some funky wallpapers around to enchant your kids further.

11. A Green Haven

A Green Haven

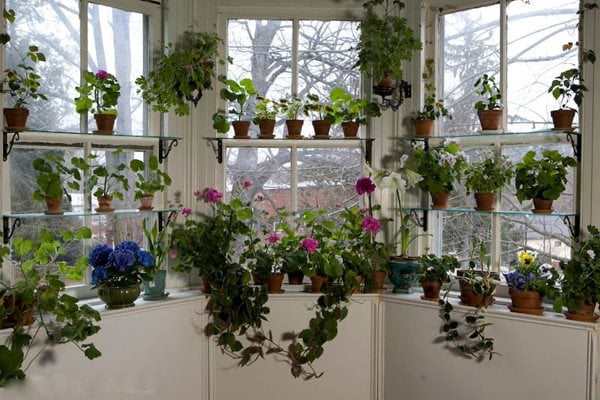
What can be better than creating a haven for your house plant pets? One can wonderfully place plants of all sizes near the bay window area. One accent chair amid your plant buddies will make it the contemplative corner.

Another advantage of having this setup is your plants will grow well in the natural light. You could also use the window sill to place the smaller plants and succulents.

12. Combine Workspace with Coziness

Combine Workspace with Coziness

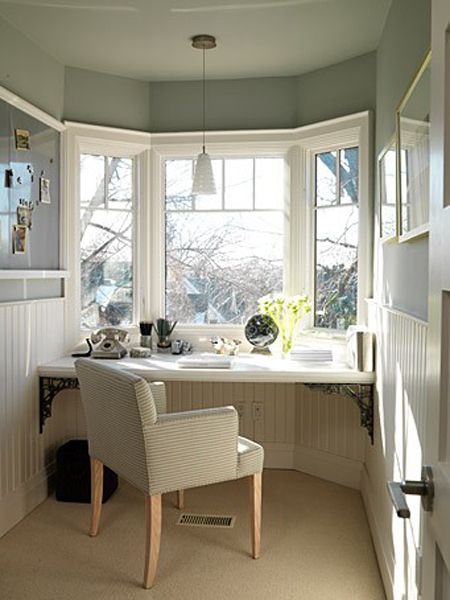
The idea of work and coziness don’t go hand-in-hand. The reason being our brains are conditioned to be seated on office desks and chairs to complete long work hours.

But if you’ve got a bay window and have a work-from-home or hybrid work model, you can pretty much design a cozy workplace in front of your bay window. All you need is a cozy work desk and an ergonomically designed chair. Some window treatments would be essential to hide from the Sun during summer.

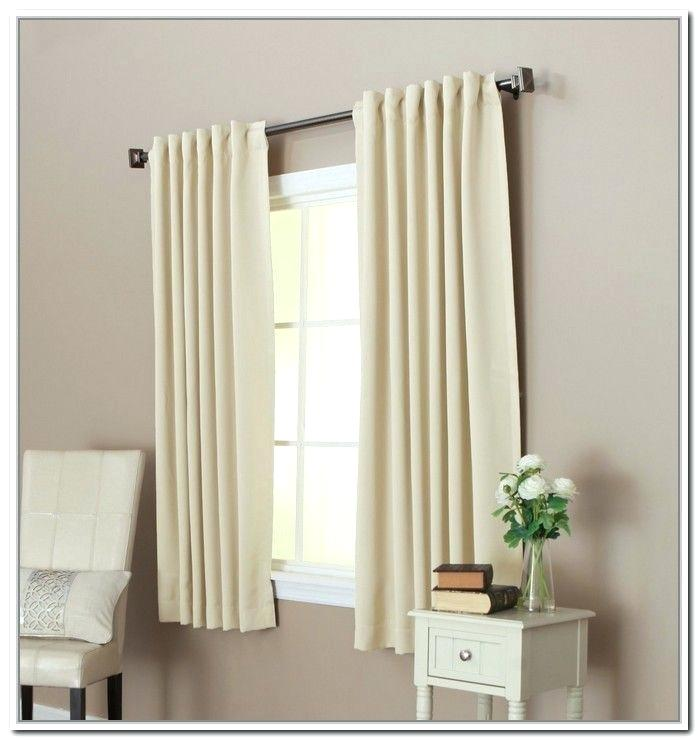
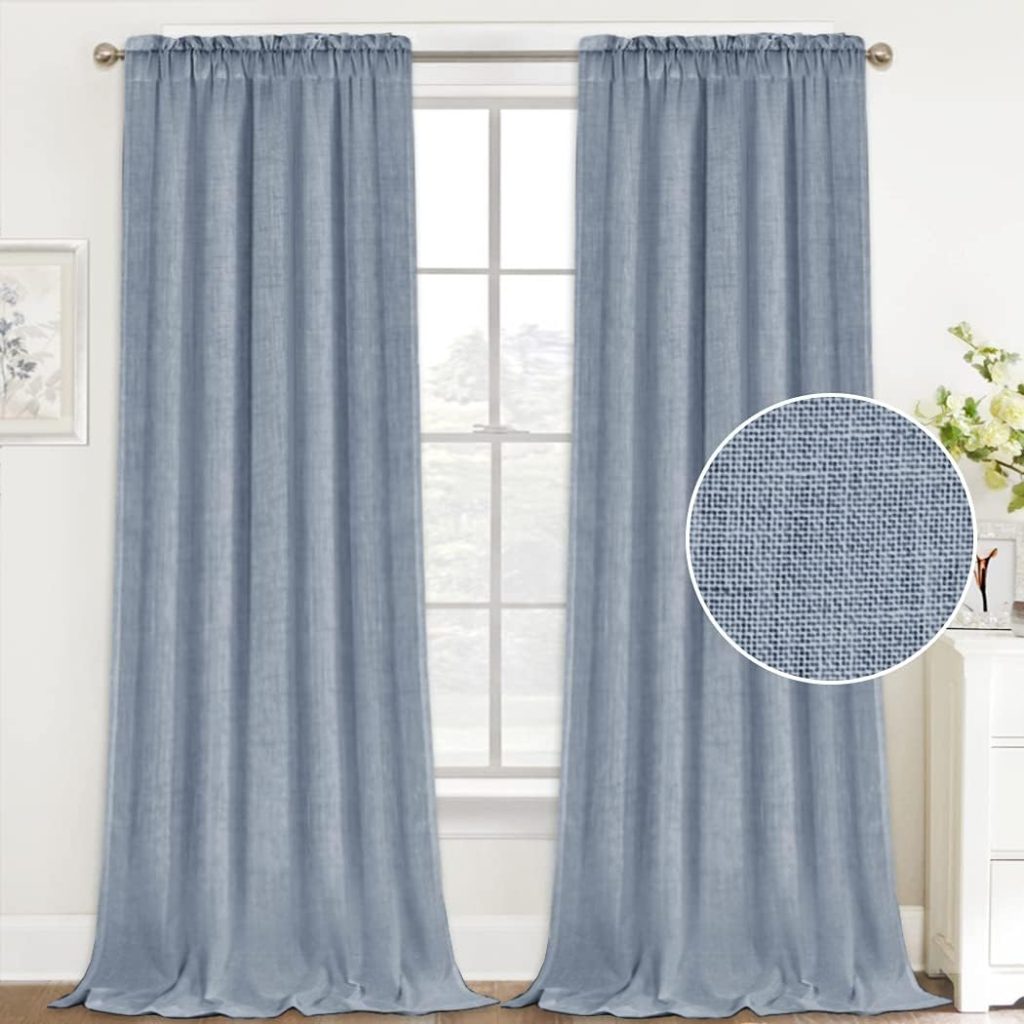
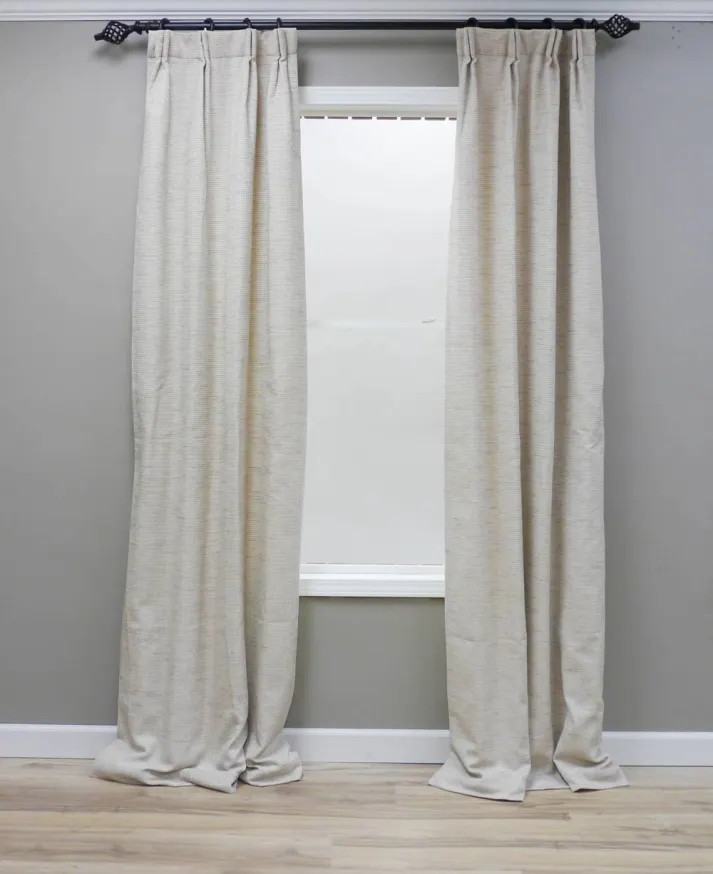
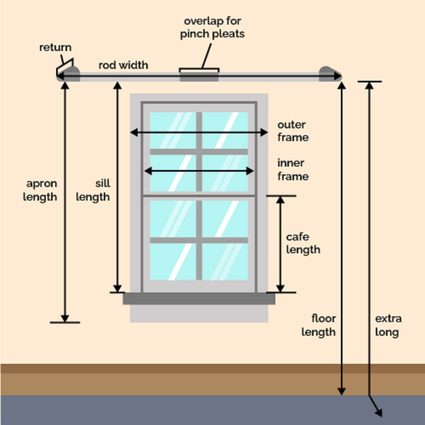
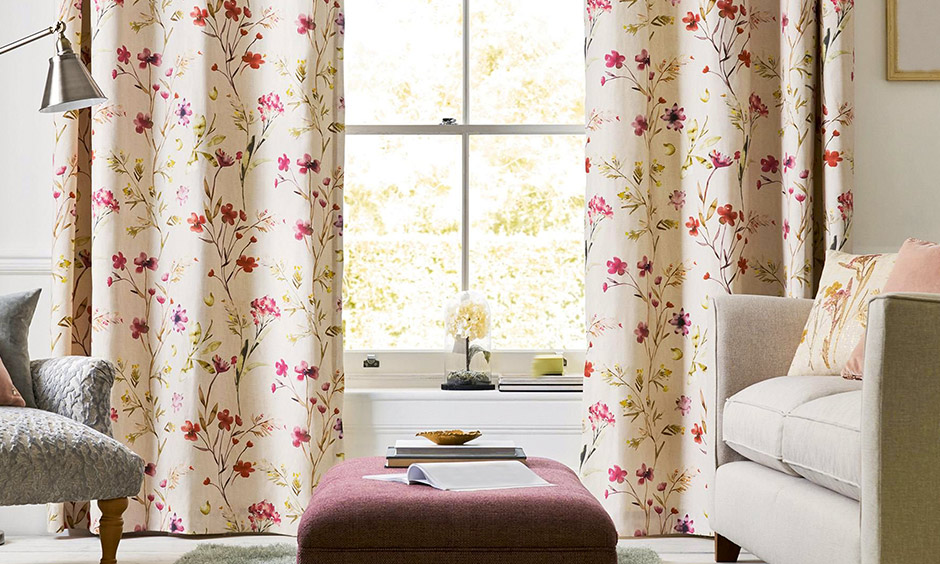
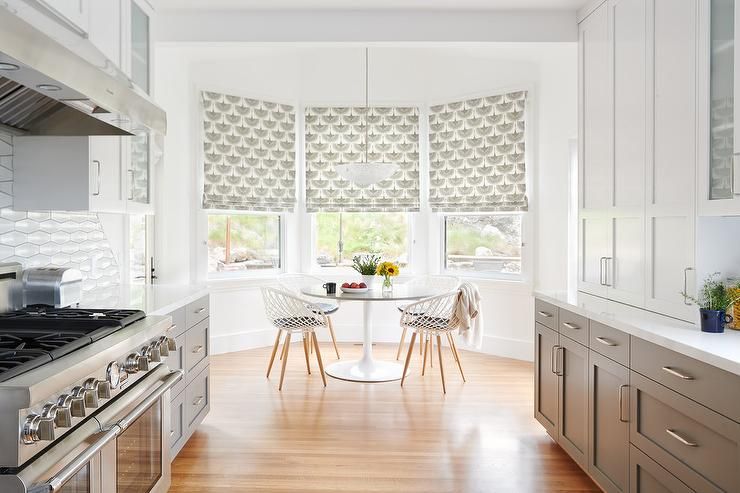
13. Try Some Unique Window Treatments

Try Some Unique Window Treatments

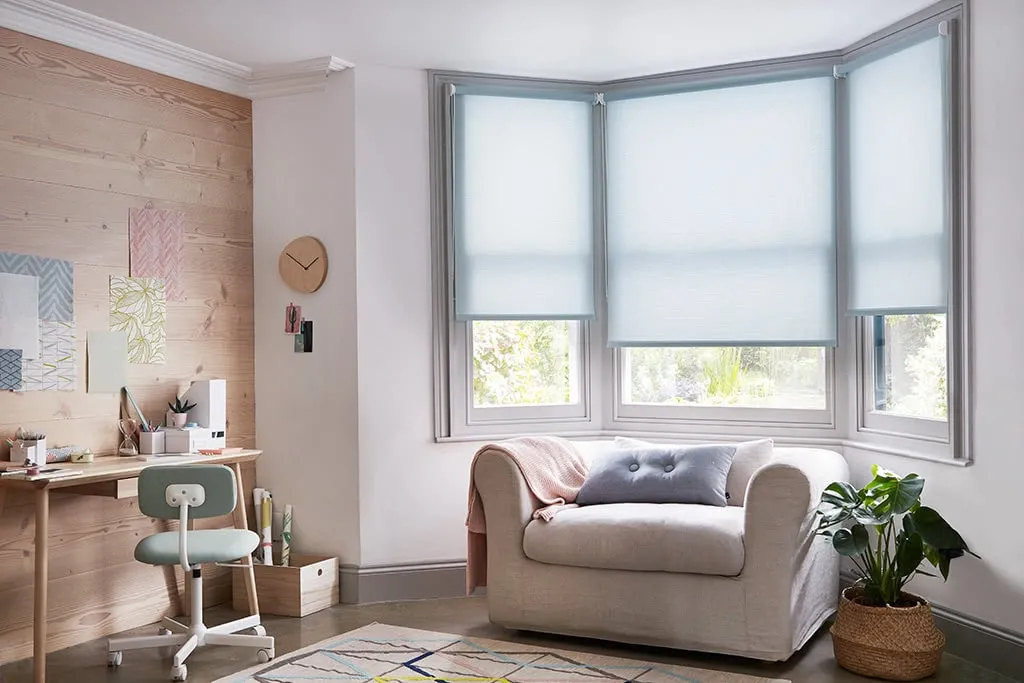
What could be better than using some window treatments for your bay window? A flurry of options is available when it comes to using window treatment options. Floor-length curtains in flashy patterns and floral designs are a certain way to make the bay window a focal point of your apartment.

Simple roller shades, Roman shades, half-length curtains, or a combination of blinds and curtains would be a range of available choices. If you want to go distinct, install rattan shades or wood blinds.

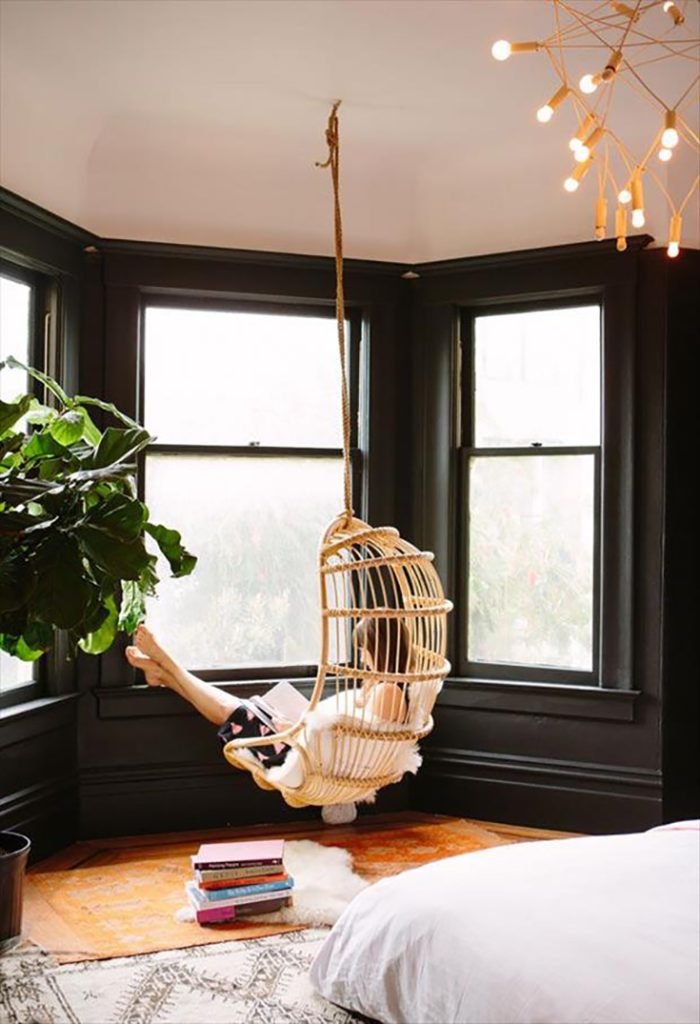
14. Add Some Offbeat Seating Options

Add Some Offbeat Seating Options

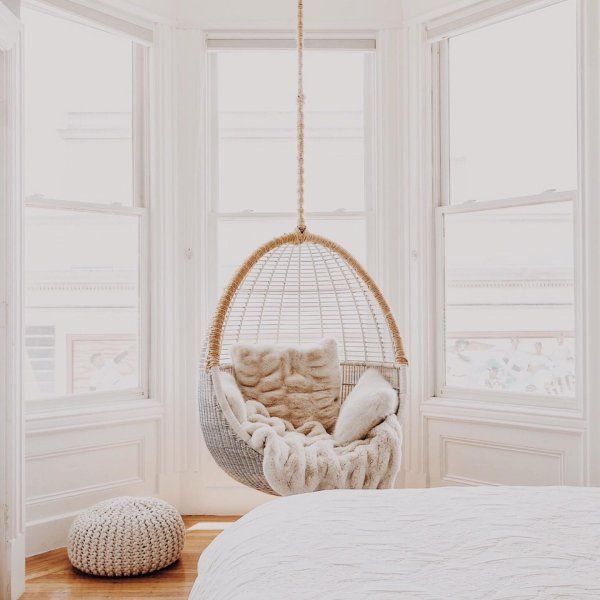
Ditch the conventional accent chairs or couches and recliners. Instead, hang a hammock to enjoy the outside view of the sea and create the feel of being on an island. A fabric swing is another alternative to a hammock.

Hanging a bubble chair will also be a splendid addition to your bay window as it won’t block the natural light. Should you want to avoid hanging seating options from the ceiling, you can add an egg chair.

15. Hang a Vintage Piece

Hang a Vintage Piece

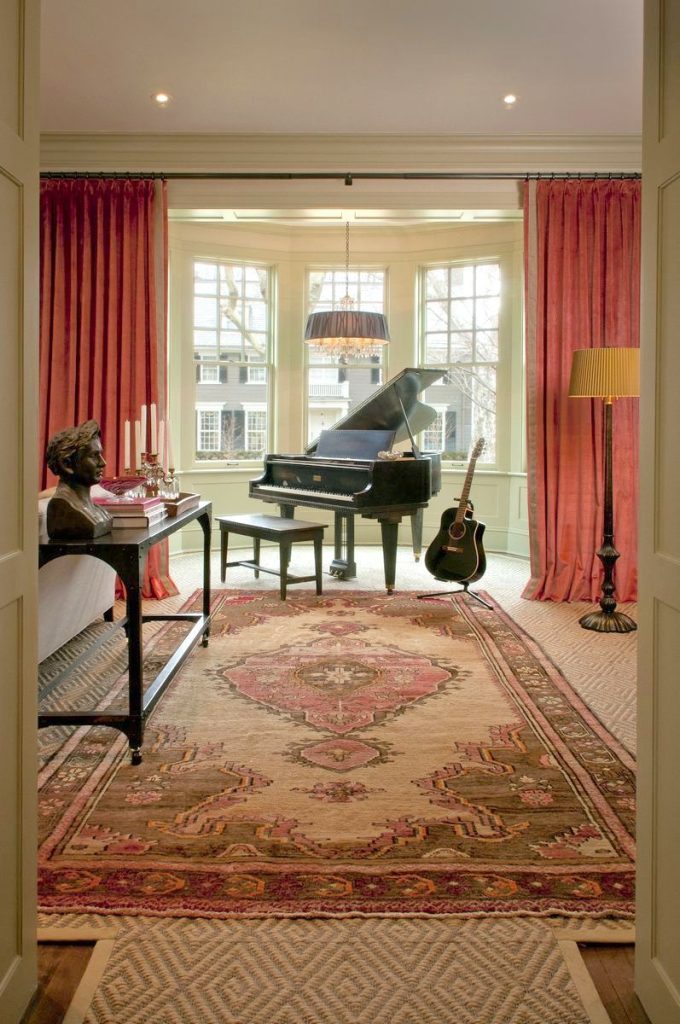
If you are an ardent fan of the vintage style, you could either add a vintage loveseat in the bay window nook or two vintage chairs with a bubble light hanging in between.

An ancient copper plate mirror hung on the wall, or an antique wall clock would be distinct additions to highlight the personality of the bay window. One also could hang a vintage piece of Spanish guitar or some timeless artwork. Your grandpa’s piano could also be a great addition to your bay window statement style.

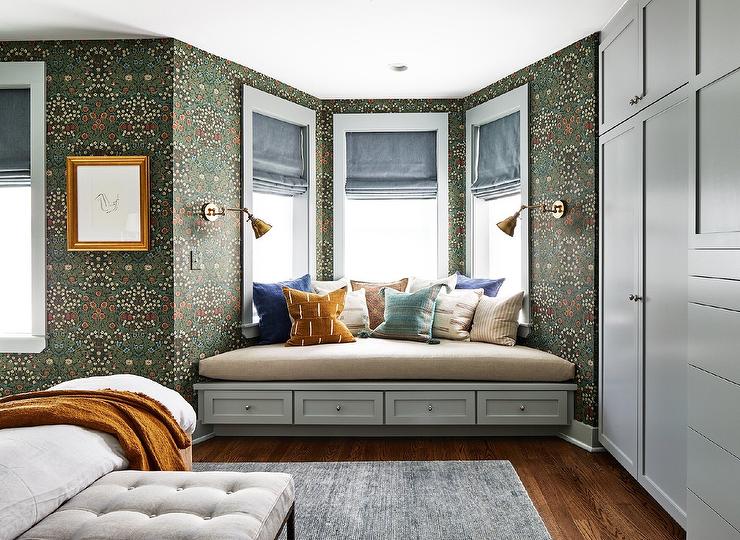
16. Install an In-Built Bench

Install an In-Built Bench

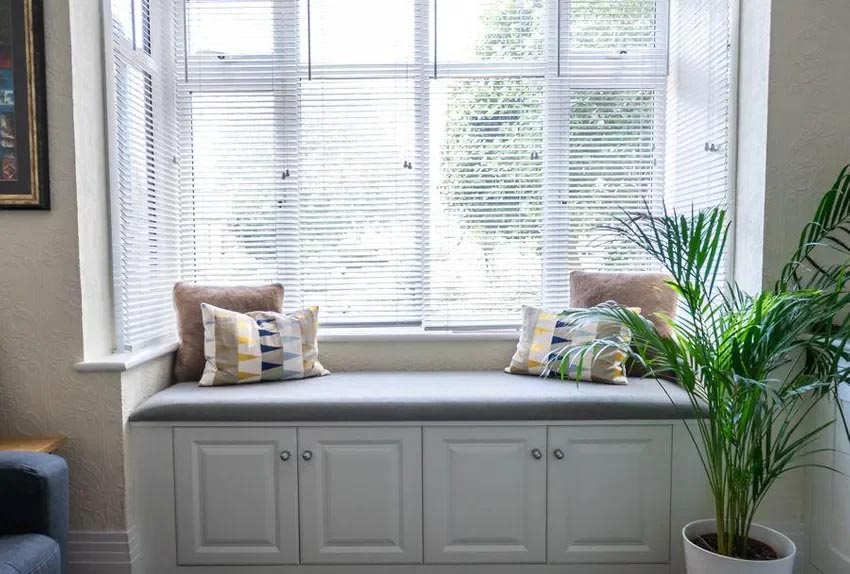
Installing a built-in bench is another outstanding bay windows ideas. What you need is a built-in bench with a bay window, a leather seat, a throng of pillows, and some rattan shades.

Having a bench with storage drawers could be useful for stuffing board games and other useful materials. A curved bench settee is an alternative to building an in-built bench.

17. Make Space for The Christmas Tree

Make Space for The Christmas Tree

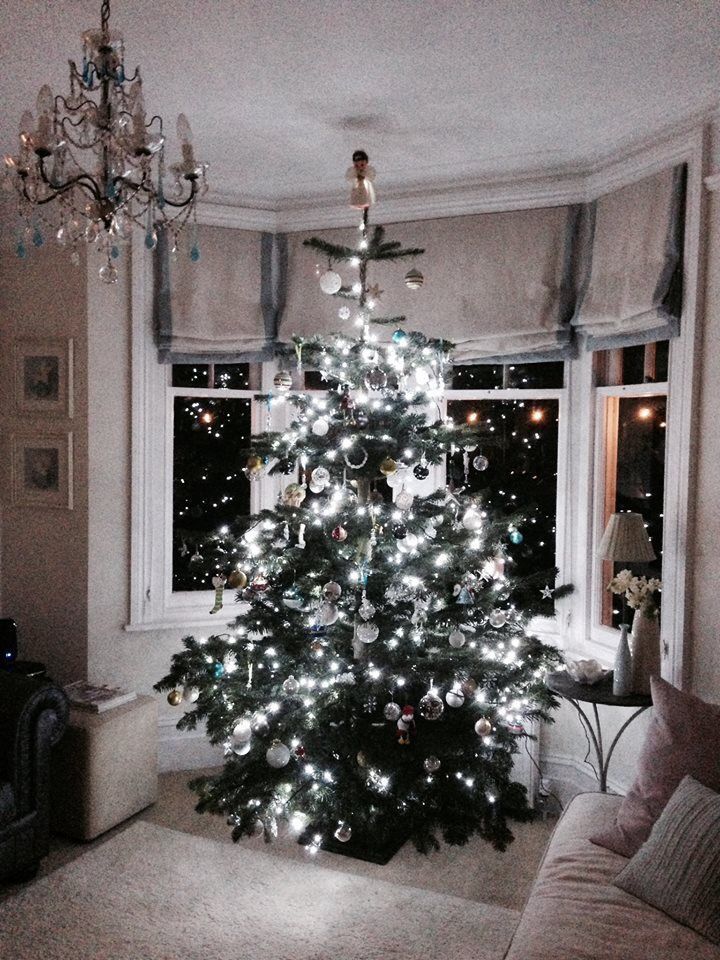
Once Christmas is over every year, instead of stuffing the Christmas tree under the stairs or in the basement, you can keep it on display by your bay window. Leave it with all its decorations and lights for a wonderful window display.

If you are someone who doesn’t celebrate Christmas, you could implement the same idea with large house plants. This is because a bay window nook is an ideal place for large plants with ample sunlight flooding the whole area.

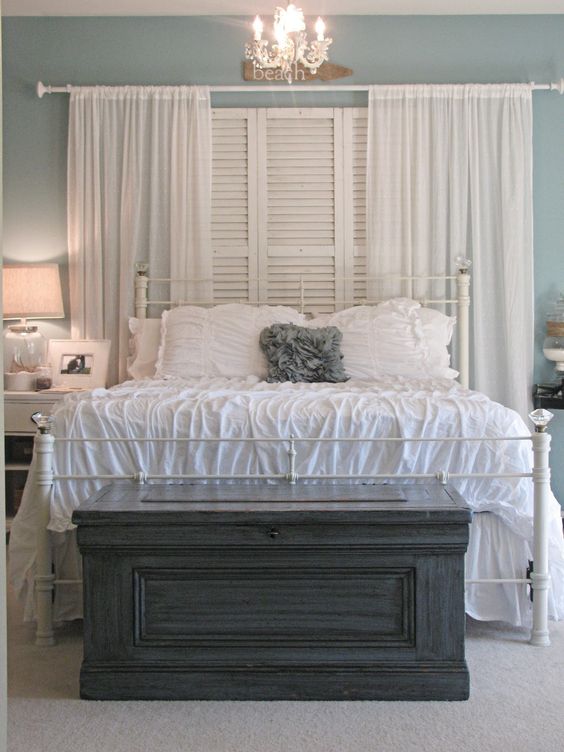
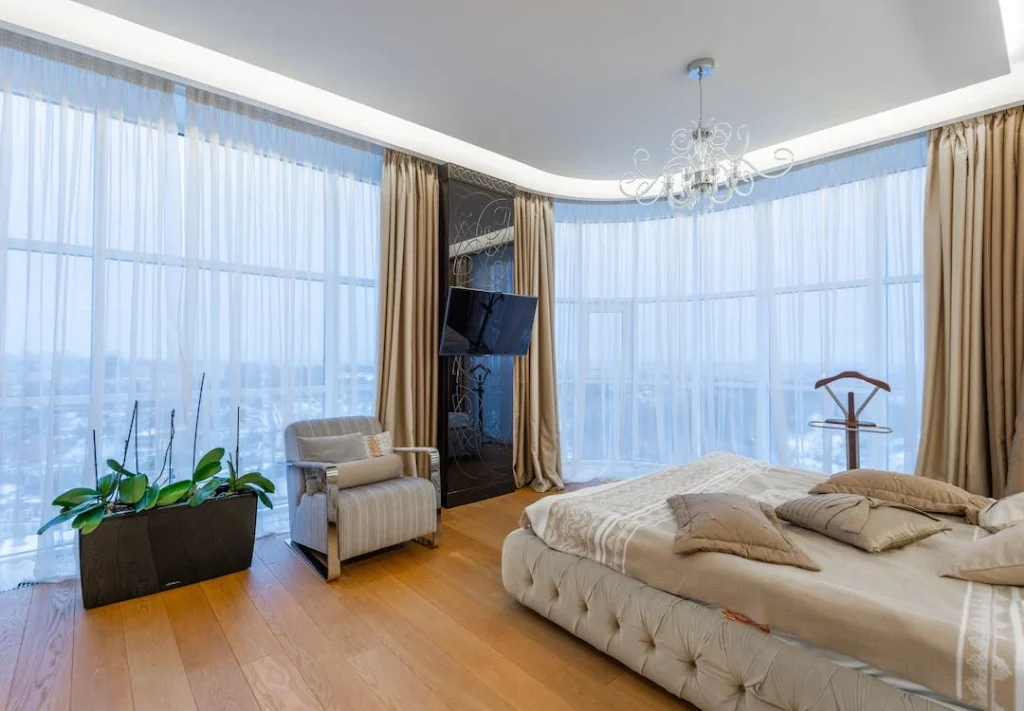
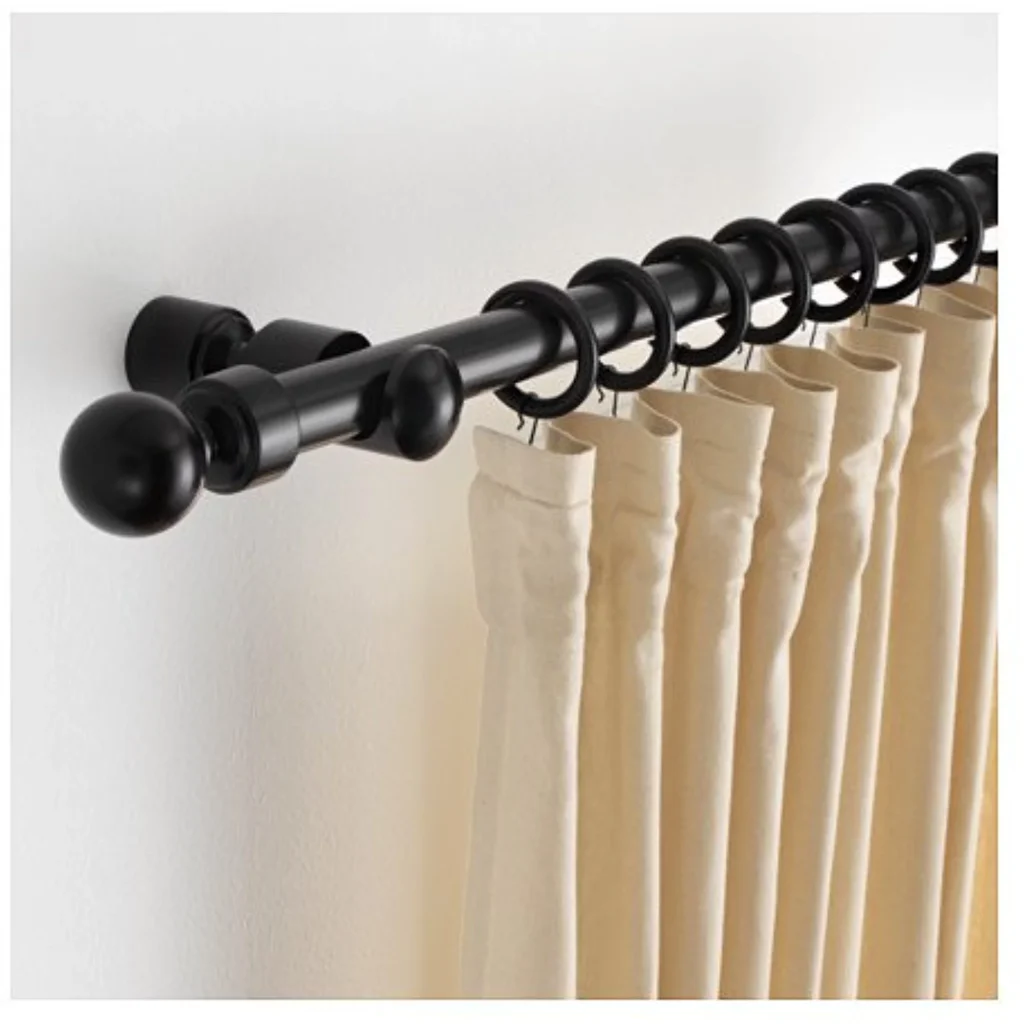
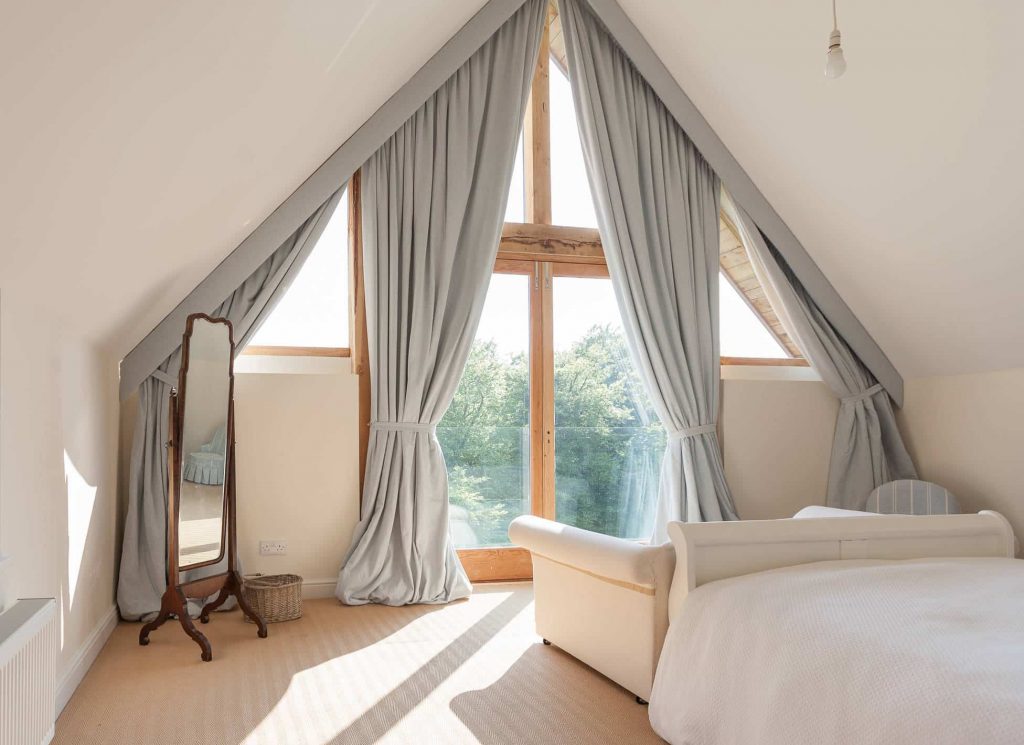
18. A Seductive Bay Window

A Seductive Bay Window

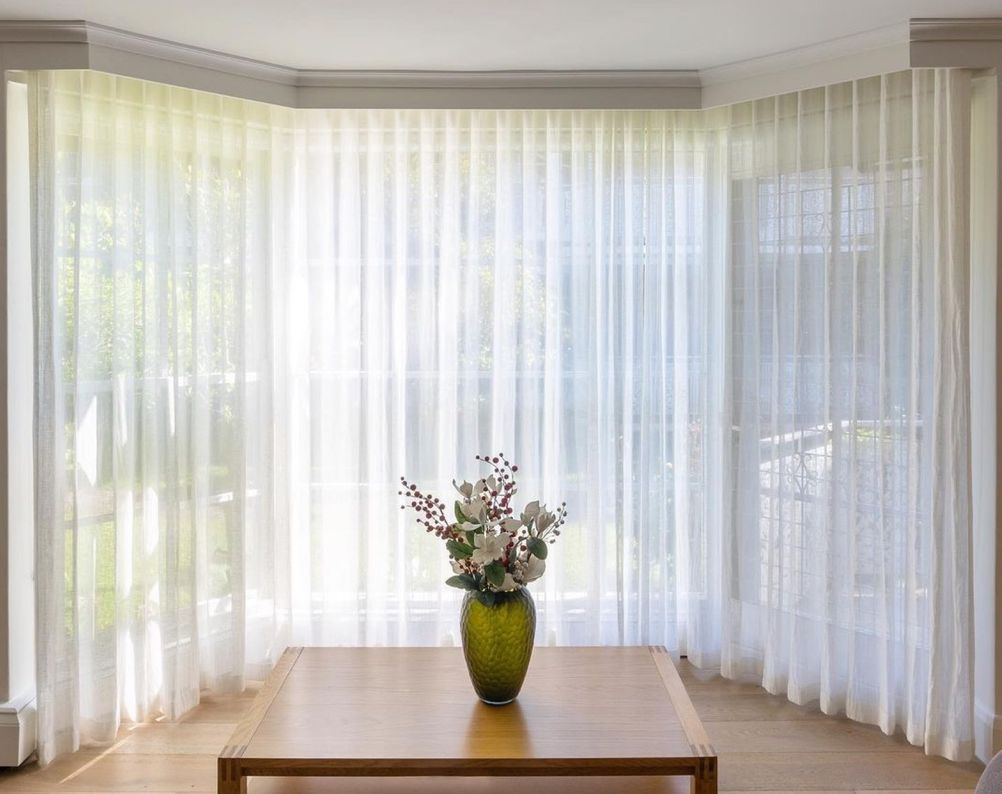
If you are not keen on blocking all the natural light yet looking for obscurity, here is the ultimate solution for you. Sheer curtains! Yes, ditch heavy blinds and add some sheer floor-length curtains.

What could be more seductive than hanging sheer curtains that impart privacy without obstructing light? Sheer curtains also come in subtle and cute shades which won’t snatch away the personality of the bay window.

19. Incorporate Window Boxes

Incorporate Window Boxes

Finally, here is another offbeat bay window idea – adding window boxes. If foliage is your thing, you can add some window boxes on the window sill outside or inside. Pour in some manured soil and plant your favorite flower plants in them. Your plants will be gleeful in the sunlight, and the bay window will be marvelous to look at.

It’s a great way to flaunt some flowers that you have been gifted on your birthday or date. If these do not work for you, you could also use the window boxes as storage boxes.

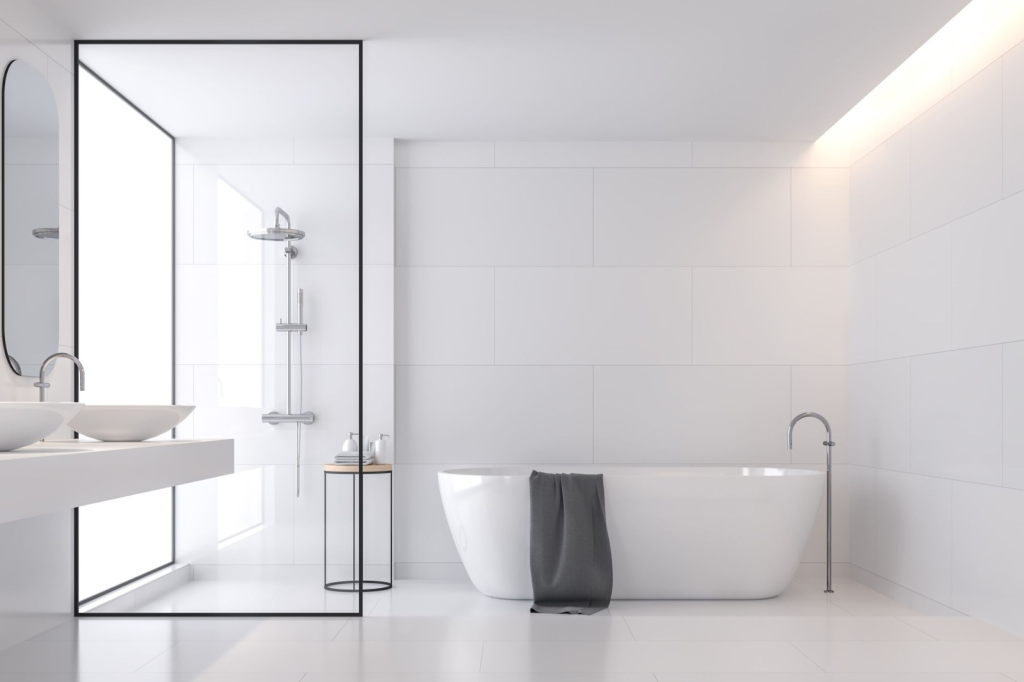
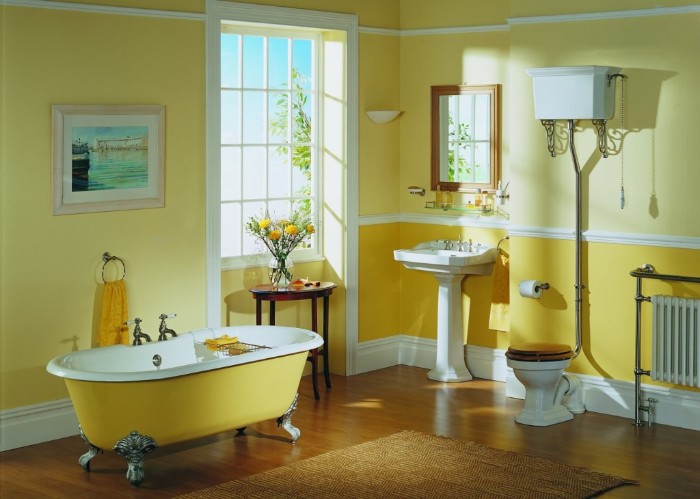
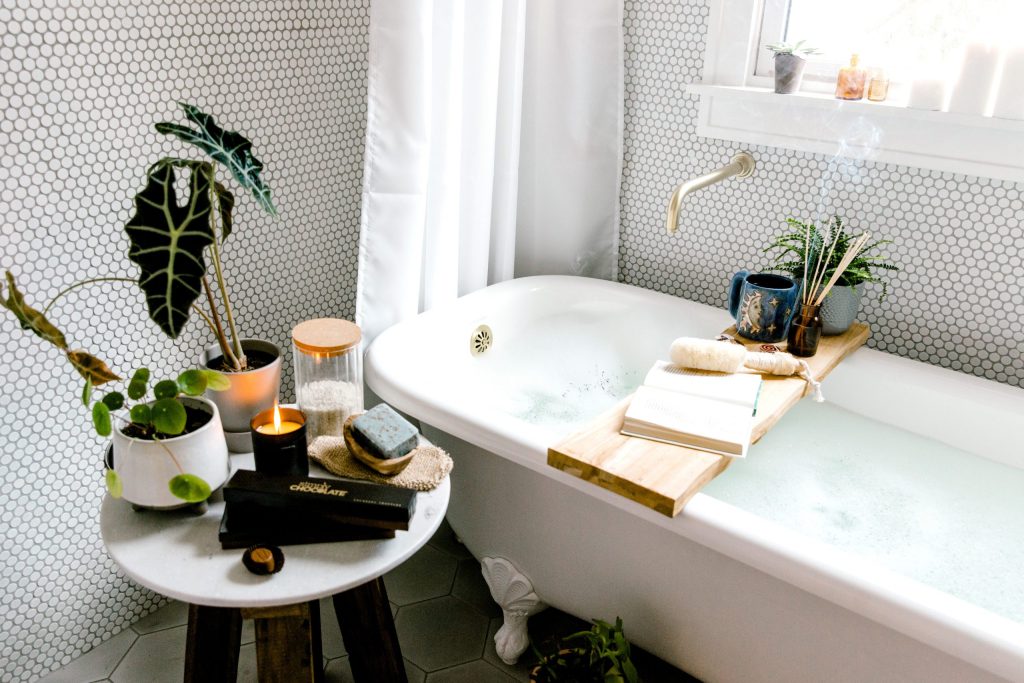
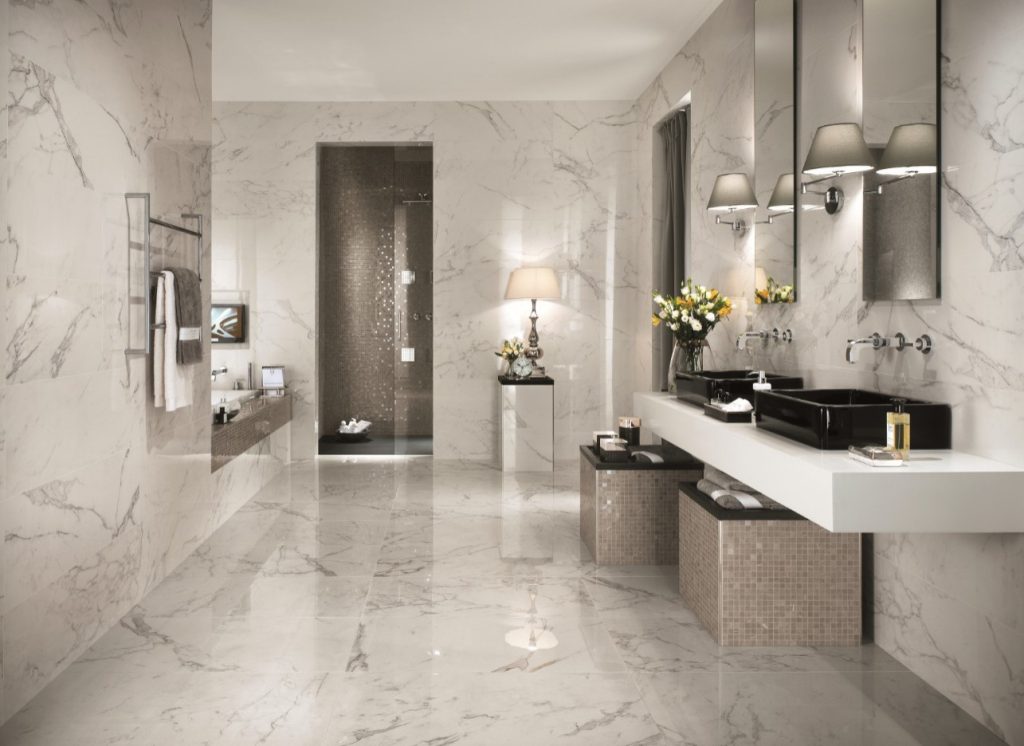
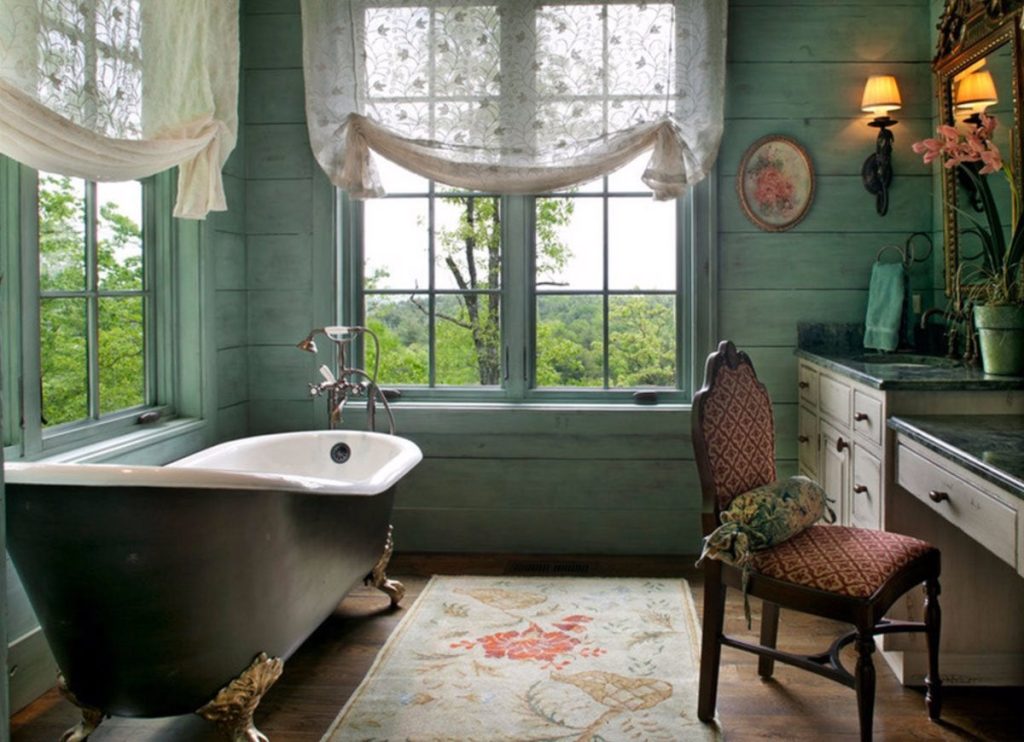
20. Take a Bath by The Bay Window

Take a Bath by The Bay Window

If you are lucky enough to have a bay window in your bathroom, what could be better than setting up a bathtub and enjoying a relaxing bath by the bay window? A jacuzzi with some sheer curtains for some privacy is something to look forward to when you get back home from a busy day.

A spacious bathtub with a bay window overlooking some natural elements like tall deciduous trees or the skyline is just what you need to forget your worries and troubles.

21. Bistro Table Set Up

Bistro Table Set Up

Do you think that living in a studio apartment with a bay window will limit your options to create a statement? No, not at all. For small spaces, you can do plenty of styles, like hanging plants from the window nook. Place some hanging lamps and bistro tables with a set of two chairs and a small rug to make your feet comfortable.

Summing It Up

Having a bay window in your apartment is an exciting thing in itself. Sitting by the window while working, sipping tea and enjoying the evening shower, or simply lounging by the window are all one-of-a-kind experiences that never get old. Bay windows are also an attractive place for your pets.

Whether you create a lounge area or hang curtains, highlighting the bay window area is always essential when you are planning interiors for your home. Once in a while, you could also alter the decoration and try something else.

There are plenty of suggestions available in the above article. You could either use the above suggestions or try something on your own. Most of our suggestions are DIY, and you could either visit an antique store or shop online for your decor items.

However, whatever design you try, ensure not to make things too bulky around the window or obstruct the natural light.

Frequently Asked Questions

Why Are Bay Windows Popular?

Bay windows have been popular for quite a few centuries now. They remain popular as they maximize the space available in a room and enhance the amount of natural light entering a room. They also enhance curb appeal. Curtains, indoor plants, and adding window seats are a few ways to enhance the bay windows’ show.

What is a French Window?

A French window consists of two panels hanging on the sides. They either open outward or inward. Glass is the general material of choice. French windows differ from bay or bow windows in having two panels against three panels and four or six panels of bow windows.

If you’re thinking about organizing shoes in a smaller or more clever storing way, it is a tough task. You might get several ideas and still feel confused about where to start. What’s worse is when you are clear about the storage space you can give for shoe racks, but you don’t get DIY shoe storage ideas that are customizable for your need.

No worries. We have covered from DIY garage shoe storage ideas to wooden shoe racks, entryway storage ideas to basket-style storage ideas, multiple-tier shoe racks to narrow shoe racks, industrial-style storage ideas to wall mounts shoe racks, shoe storage cubbies to organizer trays, and more.

We curated this list of 15 clever DIY shoe storage ideas to help you store and organize your shoes in a good way.

1. DIY Garage Shoe Storage Ideas

DIY Garage Shoe Storage Ideas.jpg

If you are looking for a smaller shoe rack, this idea is for you. To prepare this garage shoe rack with DIY, you will need 15 metal rods to make the shoe rack rails and ten wood pieces of 1.5” X 1.5” strips consisting of six cutouts of 10 inches each and four of 20 inches.

Determine the length of storage space so that you have an exact idea of how big the garage shoe rack you want. Here we have used the four wood pieces 20 inches to use vertically to prepare the frame of the garage shoe rack. Then six wood pieces, 10 inches each, to use horizontally and fix the metal rods.

Pick up two 20-inch wood strips and attach three wood strips of ten inches to them horizontally. Repeat it for the opposite frame. Now drill holes in horizontal strips, five in each, and insert the metal rods on both ends. Your garage shoe rack is ready. Give the finishing touch and paint it. For comfort, you can change the length, so keep all other dimensions from rod length to wood frame pieces.

2. Rod Shelf DIY Shoe Storage Ideas

Rod Shelf DIY Shoe Storage Ideas

This style allows you to store the maximum number of shoes in the minimum storage area. So this DIY idea is best for those who want to store a maximum number of shoe pair in the minimum area. You can use the old closet frames to install the shelving in them to make them like the industrial-style shoe rack with a DIY process. You can also prepare this shoe rack by mounting the shelves directly on the wall. You can use iron rods, plastic rods, wood strips, or even wood sheets.

The idea is to fix the two rods together in a smaller rod at ninety degrees and mount all three of them on the wall. The one pipe-style shelf is ready. Repeat it with the other rods. For a more professional approach, you can use the double rods of curtains. You only have to mount them on the wall or any of your old closets to create multiple Industrial style shelves.

3. DIY Wooden Shoe Rack

DIY Wooden Shoe Rack.jpg

If you are looking for a smaller shoe rack, try this wooden shoe rack. You will need wood plank, nails, and other DIY requirement materials. Cut two wood planks as longer pieces so you can use them as the top and bottom of the shoe rack. Cut two wood planks in smaller sizes to use as the two opposite faces that attach the top and bottom of the shoe rack. Give them the finishing touch with the sandpaper and use a primer for wood.

You can also paint them if you want. Fix and insert the nails to attach them and prepare the frame for the shoe rack. For the mid-century vibes in this DIY wooden shoe rack, you can attach wooden legs on each corner using the small wooden pieces converted into legs.

4. Seven Tier Shoe Racks

Seven Tier Shoe Racks

If you want to create a professional shoe rack, you have two options. Either buy one like this 7-Tier Shoe rack for a professional look or make one like this with DIY. If you are ready to give your best efforts, this 7-tier shoe rack idea is for you. This 7-tier shoe rack can have 28 cubbies, and you can organize up to 28 pairs of shoes in it. Use can prepare 28 cubbies of the same size and attach them in this pattern of 7 in one stack, 6 in the next stack, and 5 in the next and decrease like this.

But if you don’t want to make individual cubbies, you can create small shelves like this or a multiple-tier Shoe rack with 7 tiers. You can create a frame of a rectangle shape with a plastic sheet or wood ply sheet. Divide the frame into four equal parts vertically by inserting a playsheet or plastic sheet vertically. Now attach the horizontal shelves to create the cabinets and cubbies. Once done, give the finishing touch.

5. DIY Entryway Shoe Storage Ideas

DIY Entryway Shoe Storage Ideas.jpg

To prepare this entryway shoe rack, you will need wood planks, screws, measuring tape, and other necessary DIY things. Determine the length and height of the entryway shoe rack, and cut the wood planks according to that. Polish them with sandpaper, primer, and paint. Pick up the longest plank to use as the back.

Pick up the 2 planks you have cut according to height and attach them on the complete edges at 90 degrees. Now attach the two more long wood planks as top and bottom bases. Insert two more similar wood planks as the shelves. The frame of the entryway shoe rack is ready. Now you can insert smaller wood plank pieces in them to give the final shape of cubbies, and your entryway shoe rack will be ready to use

6. Super Easy DIY Shoe Rack

Super Easy DIY Shoe Rack

If you want to put the minimum effort into the DIY process, you can utilize the old cupboard or bookshelves, and it will be one of the super easy DIY shoe storage ideas. Pick up the two bookcases or part of your old shelves that you no longer want to use for clothes and precious things. You can simply use the frame only and attach two bookcases. Give the surface a finishing touch, and you can also paint them if you want.

You have to take wood pieces to use the shelves, or you can also use the shelf boards to create more space in the bookcases. While using the wood pieces as shelves, attach them to the bookcases with the screws or nails, and your super easy DIY shoe rack will be ready to use.

7. Basket Style DIY Shoe Storage Ideas

Basket Style DIY Shoe Storage Ideas.jpeg

If you want to store your shoe near the entryway in a neatly organized way, storing them in a basket is a smart idea. You can use the Wicker baskets, plastic baskets, or empty crate boxes to utilize them as shoe racks. Give them a new look with the DIY by using old blankets to cover the crates or paint them to give them a new life.

Use can place these DIY crates or wicker baskets under the table near the entryway so that they don’t look shabby, as the table surface will hide the top and most of the open part of quicker baskets or crates. To create more storage space for the shoe, you can use multiple crate boxes or wicker baskets near the entryway. And this will become one of the most affordable DIY shoe storage ideas.

8. Haixin Narrow Shoe Rack

Haixin Narrow Shoe Rack

This narrow shoe rack idea is for those who are looking for a smaller and tighter space to organize their shoes. Haixin Narrow Shoe Rack has stacked cubbies that you can adjust one on another to lift it to a particular height and reduce the space on the floor, creating more room for breathable space. This narrow shoe rack consists of 5 cubbies. You can stack them like all five in one column or two columns, depending on your choice.

You can also DIY this narrow rack idea by using plastic sheets or wood sheets. Cut the wood sheet to prepare the outer frame, and then insert shelves in them after partitioning with vertical ply sheet, as described above in several other DIY methods. Or you can create five cubbies with U-shape frames as side faces covered from four sides, leaving the front and floor area open and stacking them on each other. Attach a main floor base with the bottom cubbies.

9. DIY Hanging Shoe Storage Ideas

DIY Hanging Shoe Storage Ideas.jpg

To prepare the hanging shoe rack, you will need the curtains rods you can use as the shoe hanging support on the wall. You will also need the drapery to holdbacks, screws, and a screwdriver to fix the curtain rod in the wall. Find the place where you want to create the hanging shoe rack for shoe storage ideas and fix the curtain rod in the wall so that it becomes sturdy and you can utilize it for hanging stuff.

Fix the drapery holdbacks with it to create extra storage space to hang things like belts, purses, and scarves. For the large storage space requirement, you can install multiple rods. Once you are ready with the setup on the wall, start organizing your shoes to store them as hanging shoes on the wall.

10. Wall-Mounted Shoe Storage Ideas

Wall-Mounted Shoe Storage Ideas

To prepare this DIY wall-mounted shoe rack, you will need a primed casing, wood strips, nails, paint, and a saw. Select the place where you want to mount the shoe rack on your wall. Select the primed casing that can hold the heels of your shoes and sandals. Use multiple primes casings to make a shoe rack mounted on the wall. The primed casing is already ready to use, but if you want, you can paint them before fixing them.

Cut them according to the length of the overall wall-mount shoe rack you want. Mount and fix these primed casings in the wall where you want to store the shoes, and your wall-mounted shoe rack is ready to use. Hang the shoes now on these molds of the primed casing by placing their heels on them in a way so that they don’t slip.

11. Industrial Style DIY Shoe Rack

Industrial Style DIY Shoe Rack

To prepare the industrial-style shoe rack with DIY, you will need pipes, pipe caps and tees, conduit straps, strap ties, drills, markers, wrenches, and wooden sheets. Clean the pipes, caps, and other metal materials. Assemble the pipes to create the legs of the industrial-style shoe rack. Pick up one tee, and insert the two pipes in it at each end. Insert the pipe cap in one vertical end that will work like the stand base on the floor. Use other pipe tees and pipes to complete the stand base.

Now pick up the wood sheet, give it the finishing touch with the sandpaper, and paint them. Attach the wood sheet on the pipes with the nails. Do the same for the pipes on top, and fix the wood sheet as the top base. Your two-tier industrial-style shoe rack will be ready,

12. Whitmor 3-Pair Boot Rack

Whitmor 3-Pair Boot Rack

If you need storage space for your long boots or shoes that need to be in shape, this Whitmore 3-Pair Book Rack idea is for you. For DIY, you can use a curtain rod to fix it in your closet or on the floor. Select the plastic hinges that are used to uplift things to fix in the rod. To prepare a three-pair booth rack, you have to install six plastic hinges on the curtain rod. For more storage, you can install a more even number of plastic hinges. And your DIY Whitmore 3-pair boot-like rack will be ready to use with the DIY process.

If you don’t want to invest in curtain rods and then plastic hinges separately, you can buy the Whitmor 3-pair boot rack. You will not have to do anything. It will come as ready to use boot rack. Just hang your boot soles on the hinges of the rod. They will maintain your boots’ shape and save floor space.

13. Shoe Organizer Tray

Shoe Organizer Tray

The DIY process of shoe organizer trays is easy, and you can utilize this shoe organizer tray in your mudroom or the entryway. So this is a good DIY job for a shoe rack if you want to build everything from scratch. You will need the wood Planks or sheets, a miter saw, pocket hole nails, and a nail-fixing gun. If you have a big wooden sheet, you can utilize it as the base, according to the size of the shoe storage tray you need. And create a boundary by attaching four wooden pieces at full length on all edges to make it like a box with low depth.

But if you have wooden pieces or strips instead of sheets, you can use them too. Cut the two wood strips in the same length as the front and back pieces, and cut the two in the same length as the side pieces. Your shoe organizer tray frame is ready. Cut the wooden strips of the same size to fill the frame horizontally to make it like an angled tray.

14. DIY Shoe Storage Cabinets

DIY Shoe Storage Cabinets.jpg

To prepare this Shoe Cabinet, you will need the wood and ply sheets. You will also need hinges, wood glue or nails, filler, paint, sandpaper, a drill machine, and Jigsaw. Cut the plywood to make the base of the top, bottom, back, and side faces. Keep the length of the side faces the same, and the top and bottom should be the same. Now according to their dimensions, use the size of the backside ply sheet. Create the pocket holes near the edges, and use the wooden nails to attach the wood sheets as the side edges to create the frame.

Depending on the inner frame, you can customize how you want your shoe cabinet to look. Here we have created a partition to create a shelf on the top and then parted the whole frame in two parts by inserting and attaching a wooden sheet vertically in the middle. Add the shelves with wood sheets, give it the finishing touch, paint it, and let it dry. Your DIY shoe cabinet will be ready to use.

15. Mad Souky Narrow Shoe Storage Ideas

Mad Souky Narrow Shoe Storage Ideas

If you are looking for a shoe rack idea that helps you to save maximum floor space but still store maximum shoes, try this one. You can create a shoe rack like this by DIY. If you don’t want to put in the effort, you can buy this Mad Souky Narrow Shoe Storage rack. You can prepare it from scratch from wood planks or plastic sheets.

Pick up the longer pieces of wood planks, and cut one of them according to the sufficient height you need for shoe storage space.

Cut two more wood planks of the same height. Attach them in a U shape, using the nails that attach the wood sheets. Now cut a wood piece according to the space between two opposite wood planks and their depth. Create more wood pieces of the same size according to requirement. Insert them into the frame and fix them with nails. Your narrow storage shoe rack is ready to use.

Final Thoughts

Everybody wants to organize their shoes nicely so they don’t look shabby and weird in the aesthetic interior. And creating Shoe racks for them is a great way to organize them. This post showed you 15 clever DIY shoe storage ideas to help you pick some of the best DIY ideas according to your comfort and storage space for the rack you have decided on.

We have covered various DIY shoe rack ideas so that you can also easily pick up one or more according to the efforts and time for the DIY process.

For maximum storage space, we have shared the DIY process of narrow-space shoe racks. You can also mount the shoe rack on the wall if you get a primed casing. For the professional approach, we have also included the alternatives you can buy or DIY the shoe racks using multiple things that can give you a professional look.

Are you tired of stepping into a cluttered closet every day, desperately searching for that one missing shoe or your favorite scarf? Well, if you are facing such a challenging scenario, our 17 amazing DIY closet organizer ideas can be of great help.

These innovative solutions will not only help you combat the chaos but also add a touch of creativity to your wardrobe. From clever hanging systems to customized shelves and space-saving hacks, our closet organizer ideas are designed to optimize every inch of your closet. Whether you have a small closet or a spacious walk-in, these practical and stylish ideas will inspire you to transform your cluttered chaos into a streamlined haven.

Get ready to reclaim your wardrobe and enjoy the bliss of an organized closet!

Here’s a List of The Best DIY Closet Organizer Ideas

1. Hanging Shoe Organizer

Hanging Shoe Organizer

If you’re searching for closet organizer ideas, consider utilizing the often-overlooked space on the back of your closet door. Installing a hanging shoe organizer can be a revolutionizer, keeping your footwear neatly arranged and easily accessible. This clever solution maximizes vertical space, providing storage for your favorite pairs without taking up valuable floor or shelf space. From high heels to sneakers, this practical addition ensures your shoes are organized, visible, and ready to complete your outfit effortlessly. Explore the endless possibilities of closet organizer ideas today.

2. Belt and Scarf Hangers

Belt and Scarf Hangers

Repurpose the shower curtain rings or shower hooks into ingenious hangers for your belts and scarves. This clever hack allows you to keep your accessories easily accessible and tangle-free. By transforming these humble bathroom essentials into stylish organizers, you not only save money but also add a touch of creativity to your closet. With the belt and scarf hangers, you can bid farewell to rummaging through tangled piles and embrace a neatly organized wardrobe. Get hold of this practical and budget-friendly solution for a clutter-free closet!

3. Tension Rod Dividers

Tension Rod Dividers

They are ingenious closet organizer ideas that can transform your cluttered wardrobe into an organized haven. By installing tension rods vertically in your closet, you can effortlessly create sections to categorize your clothes, bags, or even towels. These versatile dividers provide a practical and space-saving solution, allowing you to maximize every inch of your closet. With their adjustable nature, tension rods offer flexibility to adapt to your changing storage needs. With their adjustable nature, tension rods offer flexibility to adapt to your changing storage needs. So, embrace this idea and bring life to your closet.

4. PVC Pipe Shoe Rack

PVC Pipe Shoe Rack

Looking for creative closet organizer ideas? Consider a PVC Pipe Shoe Rack! Cut PVC Pipes into equal lengths and stack them up to create a customized shoe rack. This unique solution not only organizes your shoes but also adds a touch of modernity to your space. Integrating the PVC pipes can help you to customize the size and shape to accommodate your specific needs. Whether you have a small closet or a spacious room, this DIY shoe rack is a versatile and stylish option. Now, you can seamlessly eliminate the shoe clutter and welcome a tidy and fashionable storage solution.

5. Fabric Storage Bins

Fabric Storage Bins

These versatile bins offer a stylish and practical solution for keeping your belongings neat and tidy. By sewing fabric storage bins of various sizes, you can effortlessly store and categorize items like purses, shoes, or neatly folded clothes. These innovative bins add a visually-appealing charm to your closet. They also provide easy access to your essentials. Embrace the convenience and aesthetic appeal of fabric storage bins as part of your closet organizing strategy.

6. Corkboard Earring Holder

Corkboard Earring Holder

If you’re seeking closet organizer ideas, consider this clever option. This simple yet effective solution involves covering a corkboard with fabric, creating a stylish backdrop for your earrings. It adds a personal touch to your space and enables you to display your earrings effortlessly. With this method, you can easily locate and select your favorite pairs, saving you precious time during your morning routine. The corkboard earring holder is a practical and stunning addition to any closet.

7. Shelf Dividers

Shelf Dividers

They are ingenious closet organizer ideas that bring order to your wardrobe. With these nifty tools, you can effortlessly maintain neatly stacked folded items such as sweaters, t-shirts, and jeans. No more messy piles or disheveled stacks! Simply insert shelf dividers or repurpose bookends to create distinct sections within your closet, keeping everything in its rightful place. By incorporating shelf dividers into your storage system, you’ll effortlessly enhance the functionality and aesthetic appeal of your wardrobe space.

8. Hanging Jewelry Organizer

Hanging Jewelry Organizer

This practical solution allows you to hang a jewelry organizer with transparent pockets, ensuring your accessories remain untangled and effortlessly visible. With this ingenious addition, bid farewell to the frustration of tangled necklaces and misplaced earrings. The clear pockets provide a convenient display, allowing you to locate and select your favorite pieces easily. Whether you have a vast collection or just a few cherished items, the hanging jewelry organizer is a stylish and efficient way to keep your jewelry organized.

9. Drawer Organizer

Drawer Organizer

When it comes to closet organizer ideas, the drawer organizer proves to be a transformative solution. By utilizing drawer dividers or repurposing small containers, you can easily separate your socks, underwear, and other small items. It brings about a paradigm shift in how you maintain your closet. This simple yet groundbreaking innovation ensures that everything has its designated place, making it easier to find what you need at the right time. Try the drawer organizer and experience the extraordinary results of a neatly arranged wardrobe.

10. Labeled Baskets

Labeled Baskets

Labeled baskets are a fantastic option among the many closet organizer ideas available. These handy storage solutions offer a practical way to categorize and store various items, such as hats, gloves, or seasonal accessories. By assigning clear labels to each basket or bin, you can effortlessly locate what you need, saving valuable time and minimizing clutter. Embrace this simple yet effective strategy to transform your closet into a tidy and functional space where everything has its designated spot.

11. Magazine Holder Storage

Magazine Holder Storage

Magazine holder storage is a creative addition to any closet organizer ideas. By mounting magazine holders vertically, you can discover a practical storage solution for various items. Clutches and wallets can find a neat home within these holders. Their slim design maximizes space utilization, making them perfect for compact closets. With their versatility and functionality, magazine holders add a touch of elegance to your wardrobe. You can easily find the convenience and style they bring to your daily routine.

12. S-Hook Hangers

S-Hook Hangers

S-Hook hangers stand out as an excellent option among various closet organizer ideas. By affixing S-hooks to your closet rod, you can boost the organization of your wardrobe effortlessly. These hangers provide a practical solution for displaying and accessing items like purses, scarves, and belts. With S-Hook hangers, your closet becomes a well-arranged sanctuary, simplifying your daily outfit selection. Embrace this intelligent closet organization hack today and witness the remarkable transformation it brings to your daily routine.

13. Shelf Extenders

Shelf Extenders

When it comes to closet organizer ideas, installing shelf extenders is a creative solution worth considering. These handy additions allow you to maximize your vertical space, effectively creating more room for storage. By simply attaching shelf extenders, you can transform your closet into an organized place. With the extra storage areas provided by shelf extenders, you’ll have ample space to arrange your belongings neatly. This will make it easier for you to find what you need. Select this practical and efficient approach to closet organization and enjoy a tidier and more functional space.

14. Hanging Rod Doubler

Hanging Rod Doubler

If you’re on the hunt for some genius closet organizer ideas, let me introduce you to the hanging rod doubler. This brilliant solution is here to transform your wardrobe space by allowing you to hang clothes on two levels. Picture the joy of doubling your hanging capacity without any hassle. With a quick and straightforward installation, this product can help you bid farewell to the days of cramming and clutter. Welcome to a well-organized haven where your clothes are easily accessible and perfectly displayed.

15. Repurposed Ladder

Repurposed Ladder

Looking for innovative closet organizer ideas? Consider repurposing an old ladder! Instead of letting it gather dust, lean it against a wall for a unique storage solution. Utilize the ladder’s rungs to create extra hanging space for clothes or to showcase your shoe collection. This unconventional approach adds a touch of charm to your closet while maximizing functionality. By repurposing everyday items like a ladder, you can transform your space and make the most of what you already have.

16. Wire Grid Panels

Wire Grid Panels

Transforming your closet into an organized space is simple by implementing the idea of using wire grid panels. It is one of the best closet organizer strategies. With the help of hooks or clips, you can effortlessly hang accessories, bags, and hats, ensuring they’re always within reach and beautifully displayed. No more tangled necklaces or misplaced scarves! These wire grid panels not only offer practical storage solutions but also add a stunning view to your closet.

17. PVC Pipe Hair Tool Organizer

PVC Pipe Hair Tool Organizer

If you’re tired of dealing with a mess of tangled cords and scattered hair tools, here’s a fantastic solution: the PVC Pipe Hair Tool Organizer. It’s a brilliant idea for organizing your closet! All you need to do is attach PVC pipes to the inside of a cabinet door, creating handy slots to store your curling irons, hairdryers, and other styling tools. This stunning DIY project will transform your bathroom or dressing area into a clean and organized space.

Conclusion

Incorporating DIY closet organizer ideas into your home can be a turning point when it comes to preventing and managing clutter. These innovative solutions not only enhance the aesthetic appeal of your space but also optimize functionality. It makes your daily life easier and more efficient.

By implementing well-thought-out closet organizer ideas, you can maximize the available space, ensuring that every inch is utilized effectively. Whether it’s adding shelves, installing hanging rods, or utilizing storage bins, these simple modifications can make a world of difference. DIY closet organizer ideas promote a sense of ownership and personalization. You have the freedom to design and customize the organizers according to your specific needs.

By taking advantage of these ideas, you can transform your closet into an appealing one. So don’t wait any longer – start on the journey of organizing your closet today!

Frequently Asked Questions

How Can Closet Organizer Ideas Help Me Achieve a Clutter-Free Life?

Closet organizer ideas offer practical and creative solutions to maximize your closet space and keep it organized. By implementing these ideas, you can create designated areas for various items, such as shoes, accessories, or clothing categories, making it easier to locate and retrieve items when needed. It saves time and effort and also eliminates any sort of clutter from accumulating. A well-organized closet can create a sense of order in your daily life.

Are There Any Innovative Closet Organizer Ideas to Optimize Limited Closet Space?

Yes! When dealing with limited closet space, you can optimize it with innovative ideas. Try cascading hangers to hang multiple garments vertically and install a pegboard for versatile accessory organization. These simple solutions help you maximize space and keep your closet organized and clutter-free.

How Do I Decide Which Closet Organizer Ideas Are Suitable for My Specific Needs?

Choosing the right closet organizer ideas depends on your individual preferences and the items you need to organize. Take inventory of your closet and assess your storage needs. You should consider different factors such as clothing or accessory type, available space in the closet, etc. Browse through the 17 brilliant DIY ideas provided and select the ones that align with your requirements and resonate with your organizational style.

Making your bedroom perfect for resting and sleeping in between styles and creativity is difficult. You struggle to find the right type of creative pieces of headboards to make your room awesome. What’s worse is when creative headboards are expensive and don’t suit your room interior and then cost you heavily again for the replacement.

No worries. We have curated this list of 25 easy DIY headboard ideas for your bedroom to help you find the most suitable headboards for your room, to enhance the looks and creativity of your room interior.

We have covered from the corner headboards to the nightstand wrap headboards, mirror headboards to full wall headboards, the traditional headboards to the four poster headboards, wall-mounted headboards to the panel headboards, and more DIY headboard ideas, according to your room size and space.

1. Corner Headboard

Corner Headboard.jpg

If the room is smaller, like a studio apartment, you can make it more creative with the corner headboard DIY. Set your bed in one of the room corners and fix a corner headboard around it. You can fix the headboard with the wall or bed according to your suitability. It will create cozy nook vibes in your room, giving it the design of a larger sofa cum bed.

2. Entire Wall-Covered Headboard

Entire Wall-Covered Headboard

Cover the entire wall with the headboard if you have a large bedroom and are ready to experiment with it with a little risk. Use the sophisticated or painted panel as a headboard, according to your room’s interior. This entire wall headboard will bring looks of boldness to your room. Place the bed in front of this entire wall headboard.

3. The Art Headboard

The Art Headboard

To make your room creative with art, you can fix an art display behind the bed with the wall to make it an art headboard. Ensure that the art frame is large enough to cover the width of your bed and mounted close enough to make it part of your bed.

If you want to DIY, take a plywood board long enough for your bed’s thickness. You can cover it with the art prepared by you on a canvas or long fabric. To make it more creative, use the frame around your art to make it an art display, like DIY headboard ideas.

4. Nightstand Wrap in The Headboard

Nightstand Wrap in The Headboard

Creating the nightstand-wrapped headboard is a great choice to create a minimalistic look in your room and organize its maximum stuff. It looks better in the small rooms. To prepare this headboard, cover the wall behind the bed with a wood board larger than the bed size. Arrange the nightstand setup in one corner attached to the headboard, adjacent wall, and bed in one corner, and your nightstand headboard is ready.

5. Tulle Canopy Headboard

Tulle Canopy Headboard

If you want to make your bedroom like a fairy tale canopy is worth trying to create a light net headboard. This canopy is a great magical headboard for kids’ rooms, especially for girls fond of fairy tales.

Use the tulle frame canopy and hang it over one side of the bed to the ceiling to make it seem like the curtains are failing from the roof to the bed. Arrange the falling fabric over the head side of your bed to give the finishing look. You can keep the canopy color white or pink or any light or neutral or complimentary color according to your room design.

6. Mirror Headboard

Mirror Headboard

If your room is smaller and people in your home are more disciplined, nothing can be better than a mirror headboard.

Fix a big mirror in the wall behind your bed, and you can cover the complete wall for a better look and brighter vibes. This mirror headboard will make your compact room much larger, lighter, and more luxurious.

7. Plywood DIY Headboard Ideas

Plywood DIY Headboard Ideas

For the simple Plywood DIY headboard ideas, you will need the plywood board and wooden frame to attach to the bed or mount to the wall. Ensure that the headboard frame is long enough to cover the entire bed. Sand the wood with sandpaper to smooth the frame as well. Cover the frame with the plywood and fix it with the help of screws by drilling small pocket holes in the plywood. Mount it with the bed or wall to fix it and make it sturdy.

8. Curtains Headboard

Curtains Headboard

If you want simple and cozy headboard ideas, curtains are the easiest option to create one. Use a curtain rod above your bed mounted on the wall. Ensure that this rod is long enough to cover the bed corners. Use two-panel curtains to create the break puddle style, and you can open the curtain to make it stylish by draping it over both sides of your bed.

9. Wingback DIY Headboard Ideas

Wingback DIY Headboard Ideas

The wingback DIY headboard ideas are worth trying if you want to make your bedroom creative with a cozy and visually appealing attraction. They have a few protrusions on one side of the frame, and the top protrusions are common among them. You can create this type of headboard by DIY over a simple playboard that you can attach to your bed.

Use the thick foam sheet to create the fluffy vibes over the ply sheet and to create the shapes of wings by cutting the top side in continuous curve shapes to make the simple design. Take a solid hard cover fabric to cover the form to make it like a headboard. To give a final look, you can use the adhesive to stick the fabric with the form in the consistency of parallel vertical lines.

10. Add Blanket DIY Headboard Ideas

Add Blanket DIY Headboard Ideas

If you are looking for the easiest DIY headboard ideas to prepare within a few minutes, the Blanket DIY headboard ideas are worth trying. You will need a simple plywood board that is long enough to cover the length of the bed face; you can easily DIY it to make it creative.

Take an old blanket that still looks aesthetic or has a good pattern to brighten the room and drape it over the plyboard. You can stick it over the plyboard with the help of adhesive on the corners or use threads to tie it to the wooden playboard to make it sturdy.

11. Slatted DIY Headboard Ideas

Slatted DIY Headboard Ideas

If you want to adjust your bed near or in the front of your room window, a slatted headboard is worth trying. You’ll need a wooden frame and more wooden sticks to create these DIY headboard ideas. You can also prepare the frame by yourself. All you need to do is, take three wooden sticks and keep them parallel at a greater distance to that the total width turns out to be more than the length of your bed.

Now carefully place three more wooden sticks over the middle and one wooden stick parallelly and horizontally at an angle to create a slight slope. Screw the ends of these wooden sticks to the two vertical parallel wooden stocks to fix them. Repeat the pattern on the remaining wooden stick without layered wooden sticks with the middle wooden stick. You can also add more wood sticks according to the requirement and in the horizontal state. Your slatted headboard is ready, and you can mount it to your bed.

12. Flat-Roof Canopy Headboard

Flat-Roof Canopy Headboard

A flat-roof canopy is worth trying if you want a magical and aesthetic upholstered headboard. To create this headboard canopy, you will need at least two curtain rods to mount in the wall and ceiling of the roof of your room. Use the canopy curtain to drape over the curtain rods to create the flat roof headboard.

Drape the curtain in such as way that it will cover the bed from floor to a great height or around the ceiling behind the head of the bed, and drape the remaining curtain length on the second rod mounted on the ceiling to cover the bed surface from half to full depending upon your choice and set the small part of curtain free to create a layer. For creativity, you can use the patterned or textured canopy curtain and adjust the curtain rod height as per your requirement below the ceiling.

13. Gallery Wall Headboard

Gallery Wall Headboard

To create a creative or memorable headboard, try the art gallery and incorporate some of your best pictures or memories within a few frames to make it stunning and personalized. Mount the frames on your wall, organized behind the bed, to create the headboard.

To make it minimalistic, you can use similar-sized frames, and to make it creative, you can incorporate different frame sizes with similar shapes – for instance, all rectangular or square frames to hang your art or memories. You can buy or create great art pieces if you know how to create art and paintings well.

14. Upholstered Wood Frame DIY Headboard Idea

Upholstered Wood Frame DIY Headboard Idea

To prepare this gorgeous upholstered headboard, you will need fabric as wide as a bed, adhesive to stick the fabric with, a form mattress pad of 1-inch thickness, plywood, and six wooden boards, where two boards have the same dimensions, pocket hole screws, braid nailer and a french cleat.

To start with, lay down the headboard on the fabric and mark the outline to find out the exact requirements of the fabric. To ensure the smoothness of wooden boards, use sandpaper and rub them for final finishing. Take the two boards and create two pocket holes with drilling on one side of each board. Also, drill countersink holes in the adjacent sides of the pocket holes at a greater distance. Repeat the pocket holes drilling place, fit the U shape edges on the plywood top, and set the bigger boards around its edges. Clamp both of these types of boards and stick them by the pocket hole screw.

15. Dowel DIY Headboard Ideas

Dowel DIY Headboard Ideas

If you want to DIY the minimalist headboard, the dowel DIY headboard ideas are worth trying. You will need a wooden frame to start the DIY process. You can use wooden bamboo sticks, plywood strips, or even neutral-colored ropes, depending on availability and comfort. Fill this empty wooden frame by organizing the wooden sticks vertically at an appropriate distance.

Stick them with the frame with the help of wood string adhesive or by screwing them in the frame. If you want to use the rope, cut it into smaller ropes to consistently cover the frame height, and the frame will look partially filled with the ropes. You can tie the ropes with creative knots with the wood. If you want to DIY it most easily, don’t cut the rope; drape it smartly and carefully to create the pattern described above, and your Dowl headboard will be ready.

16. Wall-Mounted Headboard

wall-mounted-headboard.jpg

The wall-mounted headboard can double down as the headboard and a decoration piece of the wall. You can choose the outer look as a completely solid color or even textured to make the headboard creative and attractive depending on the interior of your room and your preferences. You will need sturdy, strong hooks to hang and mount it on the wall.

To secure it, you can mount all four corners on the wall and place your bed in front of it, creating an illusion of a bed part headboard. You can also mount the top of this wall mount headboard in the wall at a height that lets the base of this mount touch and sit on the base of your bed mattress, imparting the look of the bed headboard.

17. Custom Message DIY Headboard Ideas

Custom Message DIY Headboard Ideas

To create a custom message headboard in your bedroom or guest room, you can use the wallpaperdirectly on the wall or the plywood board by creating it as a headboard. Think about a short and sweet message such as “Welcome “or “Be Our Guest” or anything positive you want to write as a reminder, and think about how you can create it, simple or creative.

You can use the plastic tapes on the wallpaper to create this message for the easiest DIY headboard ideas if you want to keep the message in the simplest fonts. You can also paint them with the help of a thick paintbrush and the acrylic paint on the plyboard.

18. Traditional Headboard

Traditional Headboard

Traditional headboards are a great choice to make your room creative with art and enrich the design with a royal look. These traditional headboards consist of wood or harder colonial fabrics, where each corner has its special feature and beautiful creative design.

These traditional headboards create intricate and rich looks in your room. You can mount them in the bed frame with the DIY to make it a part of your bed or fix them on the wall inside a larger frame behind your bed.

19. Macrame Boho Vibes DIY Headboard Ideas

Macrame Boho Vibes DIY Headboard Ideas

If you are looking for easy yet creative DIY headboard ideas, you can prepare the macrame within a few minutes, and this is worth trying. You need a stick or thick rope long enough to cover your bed width to mount or hang it on the wall above the bed. Now take strings or thin ropes to DIY and wrap around the stick or thick rope vertically by creating knots.

You can select the colored strings, or you can also paint them later for finishing purposes. You will mount them on the wall by creating knots. Cut the bottom part of all the knotted strings slightly to make the macrame layered and consistent or to create a particular design.

20. Shape Slabs DIY Headboard Ideas

Shape Slabs DIY Headboard Ideas

The Shape Slabs DIY headboard ideas include crafting round and arched shapes on the headboard. Depending on your choice and the efforts you want to put in, you can create the shape of wallpaper sheets or wood or even draw them directly on your wall. Select the material you want to use as a headboard and take the help of a pencil and circular things to create the shapes.

Draw them over the wall and paint for a direct painted wall-shaped headboard. Cut the shapes with the help of a scissor or plastic sheet cover to create the shaped headboard on a wallpaper sheet and stick it on your wall behind the bed. If you are willing to put in more effort, you can create it with the help of wooden slabs.

21. Panel Headboard

Panel Headboard

If you want to light up your room with headboard creativity, Panel headboards are worth trying. They also do not need much DIY. You only have to buy the panels of wall curtains and install them in your room.

Panel headboards create different sections in the entire wall headboards. You can use leather or fabric to cover them and give the finishing touch. Ensure to choose the leather or fabric wisely according to the interior of your room, and use panel rods to fix and attach them to the walls. You can install panel headboards in one or more room walls, depending on your choice.

22. Elegant Headboard

Elegant Headboard.jpg

Are you looking to create a royal and elegant look in your bedroom with minimal effort? With the elegant headboard, you can create luxurious looks with traditional or modern vibes depending on the fabric you will use to cover the headboard.

Generally, these headboards are wider as much as your bed size and have the full height to cover the entire wall behind the bed from the floor to the ceiling. You can choose the headboard design and cover according to the bed frames. Ensure that the color of the elegant headboard goes well with your room’s interior.

23. Wallpaper Headboard

Wallpaper Headboard

If you want to experiment with the headboards or look for solutions that can be easily replaced and changed, then trying wallpaper is worth it. Use sophisticated textured or patterned wallpaper to stick on the wall behind your bed. Ensure that the length of the wallpaper is enough to clever the head frame of your bed, and the height sits well with the bed height to give the illusion of a real headboard mounted separately.

Wallpaper headboard allows you to decorate your room with art, good design, creativity, and more. You can easily cover your bedroom walls with less DIY effort. The only considerable effort you need is to buy the wallpaper for the bedroom and paste it on the wall carefully.

24. Four-Poster Headboard

Four-Poster Headboard

A four-poster headboard is the best choice if you have a large bedroom and want to make your bed the center of attention with minimalistic and traditional vibes. What you will are eight wooden sticks to create the frame. Fix four equal-sized wooden sticks in each corner of your bed with joints from the floor to a great height.

Create one more frame that will lift high on your bed size and shape with these four wooden sticks attached to the corners. So there will be a new frame from the top. You can fix it with the clamps and screws, or you can also fix them if there is hollow space to create free and rigid joints used for wooden furniture.

25. Storage Headboards

Storage Headboards.jpg

Storage shelves fixed in the wall with open flaps and several boxes create the storage headboard behind your bed space with the wall. It looks like large bed linen. Storage headboards are a great option if you want to store the stuff without compromising the creativity and aesthetic of your room interior.

The best thing about the storage headboard is using it for multiple purposes beyond the primary storage. You can use antique pieces to organize your shelf to enhance creativity and royalty. You can organize the books in the storage headboard behind the bed to create a valuable look in your bedroom.

Final Thoughts

Everybody wants to make their bedroom elegant, and choosing the suitable headboard according to your bed and room interior is the way to get there.

Selecting the right type of headboard will depend on your room interior, the design and structure of the bed along with its size, the size of the room, the space in your room after setup, and finally, the looks you want to create according to your preferences.

This post shows 25 easy DIY headboard ideas for your bedroom to make it more aesthetic, cozy, or creative. Many headboards can double as storage without affecting your bedroom’s aesthetic looks.

We are sure all of us have that one friend who spends hours and hours in the bathroom, and we keep wondering why he/she takes so long. Well, we don’t know the reason, but with these new bathroom design ideas, the space will look so stunning that you, too, will never feel like leaving the bathing area.

Before implementing trending designs, clear the area and get things organized into baskets, storage compartments, or countertops. Depending on the space available, decide what design elements can be used to transform your bathroom. If you are working on a low budget, simple tips like changing the light fixtures, wall and tile color, and adding basic embellishments and sanitaryware can give an instant makeover to your bathing area.

Even if you have a modest-sized bathroom, you can make the most of it by implementing space-saving hacks and using bold design elements to store all essentials creatively.

Exciting Bathroom Design Ideas for 2023

From traditional to modern, industrial to natural elements, minimalistic to futuristic inspirational picks, choose the option that best suits your style and functional needs.

Here’s a list of exciting 25 bathroom design ideas that can help you remodel the space seamlessly and creatively:

1. Minimalist Bathroom Design Ideas

Minimalist Bathroom Design Ideas

Having a tiny bathroom is not an issue with this simple bathroom design trend. Decorating the space with minimal accessories, including basic designs, maximizing the use of ambient light, and a false ceiling can indeed add a royal touch to your small bathing area.

From soothing colors and stylish wall mirrors to matching toned sanitary fittings and storage cabinets, you can spruce up the space in no time! Despite the lack of space, a small bathtub or sleek glass-enclosed shower with a floating bench can help you unwind.

For minimum wall space and storage area, using adaptable hooks, organizing essentials, and basic decor items on the windowsill is a great idea.

2. Remodeling Furniture

Remodeling Furniture

Besides minimal renovations, you can repurpose furnishing and decor pieces to utilize existing elements in a creative fashion. You can rectify the lack of space by using furniture as a countertop, a small ledge to form a small storage cabinet, and easily adding hooks and reflective mirrors to get a sense of wider space.

For serious space crunch issues, replace the double sink with a long vanity that has a sink and countertop, enabling plenty of room to hold daily essentials. If you do not have enough space for cabinets, add floating shelves to store additional products.

3. Monochromatic Interiors

Monochromatic Interiors

At times, even large surface areas can feel cluttered due to the incorrect placement of objects and overall layout. You, too, can create a sense of spaciousness by bringing white, pearl, and cool tints in wall colors, sanitaryware, and bathroom fittings. Using white marble tiles, creamish window shades, shimmery lights, and a white ceiling with a pop of metallic table can create a bright, clean, soothing atmosphere.

Natural materials used for stone counters with overflowing trim, hand-cut glazed edges, wood cabinets, and sparkling floor tiles can steer away from the all-white stereotype that gives a clinical look.

4. Pastel Play

Pastel Play

Modern minimalistic pastel colors used for themed walls are apricot yellowish-orange, pale pink, light orange, peach, greenish gray, turquoise, and low-key blue that give a delicate cottage-core look.

To further soften the look, you can design a simple backdrop with spotlights and decorate using vintage elements and collectibles like dainty carved sculpture pieces stacked against a beaded board.

Combine pastel colors with stylish wall sconces, metal mirror frames, dark undertones, veins in floor tiles, marble wainscoting, and traditional plumbing. You can also take inspiration from speckled terrazzo ideas to style titles, bathroom floors, and sink coverage and get an intricate seamless look.

5. Bright Dazzling Look

Transform your bathroom from a clinical to a warm look with bright-hued walls, printed tiles, and colorful sanitaryware. If you are not very keen on painting the whole bathroom, use hacks to design small spaces. For instance, rather than using traditional storage compartments, you can renovate the wall space to mount cabinets and paint them in vibrant shades.

To create a comfortable vibe, you can pair unique shades like seaweed green, champagne, biscuit, caramel, rust, terracotta, and beige with gold and silver decor pieces, metallic design elements, black tap fittings, or wash basins, stone vanity tops, and natural cream-colored interiors.

6. Lighting Fixtures

Lighting Fixtures

One of the easiest ways to upgrade the look of your bathroom is to get aesthetic lights. Get a sleek, ultra-modern look using linear lights that complement your tile and wall color. Alternatively, you can contrast the existing theme with oversized pendant lights that flood the room or use reflective surfaces that allow natural light to shine through.

Bathroom design ideas trending these days include unique crystal chandeliers, drum pendant lights, and huge floor lamps. If you are feeling braver, go all-out with pillar lights that give a reminiscent look on decorative surfaces with grooved, ribbed, and reeded finishes.

7. Tile Textures

Tile Textures

For a captivating look, opt for tile designs like backsplash, Moroccan prints, fish-scale shaped tiles, or raw organic textures. Use prints and motifs that create a ‘feel good’ ambiance for you. If you do not want to change the entire appearance, look for graphic patterns or inspirational color palettes that create an impact.

You can also repurpose terracotta flooring and salvage bricks to create a rustic, eco-friendly appeal or add a playful pop of color with jewel-green, ruby-red and light-reflecting hues. Also, check that adequate waterproofing materials are used to ensure all accessories are secured to the wall.

8. Statement Look

Statement Look

Along with lights and tiled textures, you can give a classy finish to your bathroom with patterned and intricate floor tiles. You can also add focal points like a showcase screen, curvy sculptural designs, and personalized elements like monogrammed shower curtains featuring custom prints, classic shapes, and pretty pictures that will steal the spotlight.

Another stylish focal point for your bathroom is the textured and accent wall design. For functional purposes, having a bright-colored towel warmer, wavy floor tile with contrasting shades, and other built-in amenities help with storage and transform the space instantly.

9. Artistic Vibes

Artistic Vibes

Add a creative flair to your bathroom with art decor. You can use statement pieces, unique tiles and rich textures, pretty patterns, grand lights like chandeliers, bold features, and more.

To customize the artistic vibe, you can use decor pieces that are inspired by your travels, are reminiscent of special family celebrations, or are creative works that showcase your personality.

Even in small spaces like powder rooms, the artwork can be displayed on walls or other vertical panels, a windowless space can be lit with basic lighting, while concrete floors and dark-toned marble interiors can set the right mood.

10. Privacy Hacks

Privacy Hacks

Not everyone has the luxury of having separate bathrooms for all individuals. Hence you need to maintain a serene atmosphere in this shared space. The best way to achieve privacy is to use room dividers, screens, ingenious window treatments, and steel-framed glazes that help you get dressed without getting wet.

With a compromised surface area, having a separate cubicle, a personal vanity, and a freestanding bath may not be possible, so you can install a concealed WC behind a door and create a private zone for bathing. To assemble a discreet shower, use tinted, frosted, fluted elegant screens in metallic or opaque shades that elevate the space and offer maximum privacy.

11. Open Showers

Open Showers

You can further improve privacy by installing smoked glass or transparent partitions that give a spacious feel and classy look to your bathroom. Likewise, a walk-in shower idea with appropriate waterproofing, affordable curtain panels, and a part-tiled wall can limit splashing. For smaller spaces, a bathroom with mirrored surfaces gives a spacious and bright look.

While this method is perfect for master en-suite bathrooms, you can also use it to separate the shower from other storage elements and keep things organized. Besides, this layout suits concealed and shelved storage cupboards. You can use wall paneling or a vanity unit for functional purposes.

12. Luxurious Beauty

Luxurious Beauty

Create a lavish space with luxurious bathroom design ideas that include metallic elements like gold accent walls, a stylish wash basin, an elegant jacuzzi, or a multi-sided tub incorporated with classic bulbs, grand hanging lights, and beautiful drapes.

You can draw inspiration from Parisian styles and get antique furniture, traditional light fixtures, and streamlined embellishments to give a laid-back yet grand look. Besides, adding French country-style decor like extravagant drapes, classic grand chandeliers, and monochromatic royal palettes can add to the charm.

For a more affluent experience, you can invest in bathroom design ideas featuring hydrotherapy. For instance, the directional shower helps relieve muscle aches, and the plate-style head relaxes the mind.

13. Subdued Elegance

Subdued Elegance

If you are not very keen on stretching your budget to implement luxurious, expensive bathroom design ideas, you can still add a touch of grandeur to the space with distinctive patterns and rich impactful colors. Marble walls or dark blue hues, unique light fixtures, splendid mirrors, modern archways or curved arch moldings, and soft ambient lighting bouncing off the soft round edge vanity gives a chic look and relaxing appeal.

Using warm wood surfaces, fun patterns, quirky motifs, gold wallpaper designs, floral patterns, and pocket doors at the entrance with closet enclosures help to achieve elegance even in smaller spaces.

14. Relaxed Retreat

Relaxed Retreat

Bathroom design ideas in 2023 focus on increasing wellness spaces for personal use. You, too, can now destress and unwind in your very own private spa by pampering yourself. Create a private oasis by enhancing the luxuriousness of your bathroom for optimal relaxation. You can use natural elements like brick and stone or introduce similar textures with floor-to-ceiling stone and mirrors.

With luxury fittings and scented candles, your wellness retreat, including a spa bed, steam or sauna room, hydrotherapy baths, and massage showers with a caddy on the bathtub that holds your favorite essential oils and massage essentials, can give a soothing experience.

15. Coastal Theme

Coastal Theme

Another cool bathroom design idea to create a spa-like atmosphere is choosing blue-tiled accents for walls or light blue wallpaper, white marbles, coral and shell decor, wicker accent accessories, pampas, grass vases, beach-related prints, and photo frames.

Borrowing ideas from seashore vistas, you can use bathroom decor like sand-hued mosaic tiles, bright sea-blue walls contrasted with white beadboard, and beach-theme souvenirs that create a calm ambiance and also help you create a personalized indulgent spa-like session.

You can also use breezy decorative motifs, aqua-colored matte tiles, trendy maritime elements, ship-shaped lanterns, and nautical anchor-shaped hooks to add to the oceanic references.

16. Natural Elements

Natural Elements

Earthy materials like wood, hybrid stone, organic plasters, marble, and alternatives like onyx with vein detailing have natural allure and help bring in a calm, relaxing atmosphere.

Feel refreshed with indoor plants that create a bright, airy atmosphere. Pair greenery with nature-based colors like brown, green, and white, or use wooden cabinetry and surface area to bring an organic feel while invoking a sense of calm and harmony.

Additionally, allowing sunlight to flood from big bare windows is a good way to use natural light. You can further integrate metallic bronze or natural stone vanity with plastered walls and geometric designed floor tiles and install skylights to create an illusion of a bigger space.

17. Warm Look

Warm Look

Despite the use of natural elements, there might still be an incohesive feeling if the room is not well-lit. Adding warm lights, gold sanitary fittings conflicted against dark walls, and a bathroom sink can give a sophisticated look. You can also match wall and floor designs with wooden cabinets to induce a warm vibe.

To prevent the wood furniture from getting spoiled, opt for teak, oak, or rosewood that are of premium quality, have natural oils which aid in water resistance, and age wood naturally, ensuring you have an organic touch to the bathroom for prolonged durations.

18. Mirrored Designs

Mirrored Designs

While a wall-to-wall mirror can give a sense of spaciousness, a large mirror also helps in reflecting natural light. Modern bathroom mirror trends for 2023 include choosing unique shapes, backlights, featured shapes, and stylish frames.

Complementing mirrors with warm brown-toned details, indoor plants, and beige color schemes can give a natural cohesive look, even in spaces that are not naturally lit by sunlight.

You can also maximize the shape of an existing mirror by using molded surfaces that give a three-dimensional effect. This bathroom design idea works best for circular mirrors in small spaces with clean molded lines and waterproofed moisture-rich zones.

19. Modern Spin

Modern Spin

Contemporary bathroom design ideas use progressive shades as opposed to clinical colors. To create a clean, polished modern look, use dark red, deep maroon tiled accents that add elegance. If you want to add some personality to white polished surfaces further, bring in fun graphic floor tiles and custom-made murals.

In addition to spa-style nooks, they integrate nature or other biophilic elements that reduce stress, induce creativity, and create soothing vibes. Besides, a glossy vanity unit with a smooth finish, dark wooden cabinetry, and spacious compartments under a floating sink can help you keep things tidy and maximize surface area.

20. Industrial Design

Industrial Design

Another modern bathroom design idea that is in vogue is the industrial look. Achieving this look is relatively easy and cost-effective. This concept uses concrete interiors, unrefined materials like brick walls, textured embellishments, metal pipes, unconventional sanitaryware, and lights with metallic shades.

If you think concrete gives a harsh appeal, use curvy furniture in brown shades and wood tones, LED lights, and indoor plants to soften the look. To maximize brightness, install a skylight that allows natural light to enter or use contrasting oversized pendant lights, and metal-framed mirrors, along with added fixtures near the mirror and sink areas.

21. Black Beauty

Modern Luxury Black Bathroom 3d Render,the Room Has Black Tile F

At times, gray and black shades, when used indoors, make the space look gloomy, but trendy bathroom design ideas show the creative use of black to create beautiful aesthetics. A striking matte finished floor, muted black cabinet, dark bathtubs, and laminated accessories scream luxury.

For snug settings, embrace designs that include a stone sink with dark natural cabinets, smoky palette wall paints, and textured porcelain tiles or ceramics for a bold natural look.

If you are still worried about black interiors and unwilling to experiment too much, try switching the shower dividing the area to a black frame, adding dark sanitary fittings, and using toiletries that will give an edgy look while being functional.

22. Marble Design

Marble Design

From attractive floor-to-ceiling cladding, integrated toiletries storage, and shelved corners, marble has always been used to create a vintage charm and is hence frequently used for tiles, floors, cabinets, and bathtubs. To utilize marble creatively, you can introduce it in varied colors, veining, and markings and pair it with minimal accessories to create a unique appearance.

You can use ‘vein-matching’, top-to-bottom marble surfaces complemented with gold-toned accessories like an ornate mirror to get a sophisticated look. For small spaces, matching the marble veining to the cabinet door or any other accessory can make the space look uncluttered.

23. Traditional Designs

Traditional Designs

Vintage patterns, floral wallpaper, and walls in forest green shades with bright sanitary fixtures may be considered traditional bathroom design ideas, but they add an unmistakable natural look. If you do not have access to direct sunlight or bright views, incorporating small mirrors on multiple corners can help reflect light and brighten up the space.

With smaller spaces, a delicate vintage scone accompanied by curved surface mirrors, creative wallpaper, lively colored walls, lush designs, blooming foliage detailing, and creative pieces can make a comeback to give your bathroom a warm vintage charm and tropical look instantly.

24. Eclectic Mix

Eclectic Mix

Combining modern and classic designs or traditional and contemporary elements can give a beautiful rustic look. Eclectic bathroom design ideas include using wood paneling, incorporating modern materials with existing furnishing like marble for the shower area, and polished surfaces to brighten up the space.

Blend in elements from different categories to create an eclectic look. For instance, you can use rugs, a mixture of fixtures, different patterns, varied textures, radiant colors, a blend of unique industrial materials, and fresh elements like plants to balance the look.

You can also progress with a maximalist approach by using bold patterns, informal mismatched elements, stylish wallpaper, jewel-style decor, and polished white marble surfaces for an ultra-modern look.

25. Futuristic Vibes

Futuristic Vibes

For sci-fi enthusiasts, bathroom design ideas featuring futuristic styles are a cool trend. However, even if you are a regular culturist, utilizing smart technology and home automation tools is a functional idea. Besides, using sustainable, energy-efficient eco-design technological settings can also help save energy and reduce environmental impact.

You can invest in easy installation charging and integrated USB ports, smart scales that can be connected to other home gadgets, demisting mirrors, LED temperature displays, magic mirrors that help you send commands virtually, automated washer and dryer, AI-based hand-wipe sensor panels and other smart technology that regulates water temperature according to the weather automatically.

Final Thoughts

Whether your old tiles are chipping off or the walls look dull, or you simply want to create an uncluttered look for your bathroom, opt for any of the above-mentioned bathroom design ideas trending this year that will surely help you transform your space. Besides, using natural and metallic products, sturdy fittings, good flooring, and tiled elements, you can be ensured that the remodeled bathroom will remain functional for several years.

If you are unwilling to experiment too much, begin with transforming one nook and then match other elements to go with it. You can bring your personality to choose mild or bright colors, opt for basic or luxurious decor pieces, and transform minimalist ideas into luxurious spa-like settings with timeless design principles.

Frequently Asked Questions

Which Is the Most Prominent Bathroom Design Idea Trending This Year?

The most prominent trend this year is the usage of larger tiles, specifically those made of marble or other natural stones, switching to warm natural tones and using lights and plants to brighten the space.

What Are Simple Ways to Transform the Bathroom Space?

You can transform the bathing area by simply putting in new tiles, adding a fresh coat of paint, mounting a new toiletry dispenser, adding a bright shower curtain, and replacing old fittings with shiny taps.

How Can a Small Bathroom Be Remodeled?

To transform a tiny bathroom space, organize essentials with smart storage hacks and wall-mounted shelves, add elegant lights, install furnishings that can serve multiple purposes, and use bold colors to enhance natural brightness.

Which Bathroom Design Trends Give a Luxurious Look?

Add a lavish touch to your bathing area with diagonal tiles, stylish lights, statement mirrors, unique art pieces, classy storage containers, and gold and metallic accents that make any space look grand and luxurious.

With small closets being a common trend, however, its a challenge to organize them effectively, especially in urban living spaces. Finding innovative and simple solutions for a closet organization can be your best friend. With this, you can cleverly organize things to find them easily next time when you look for them.

These DIY ideas for small closets dive into practical yet budget-friendly ways to maximize your space and get more out of your compact wardrobe and create a functional and stylish closet using IKEA products.

From clever storage solutions to smart space-saving ideas, today we will delve into IKEA’s catalog to give your small and sad closet a run for its money and transform it into an organized, clutter-free haven while making sure that till the next clean-up day, you won’t be late to your office or a special meetup.

Small Closet Ideas DIY IKEA Hacks for Your Wardrobe

Let’s swim into some of these haven ideas for your chaos-stricken wardrobe.

1. Closet Shelves: A Hidden Gem

By installing Ikea shelves, you can maximize your unused vertical space. Use them to store folded clothes, shoes, or accessories neatly. These shelves are not only functional but also stylish, adding a modern touch to your closet.

Additionally, you can further optimize the space by adding storage bins or baskets to keep smaller items organized and easily accessible. By doing this, you will be able to use more of the closet than its intended purpose giving you more space to work with, making it one of the best small closet DIY ideas.

A Hidden Gem

2. Closet Accessories: Let’s Hang Them Now

How about investing in IKEA’s hanging organizers to keep those belts, scarves, and hats in check while being easily accessible and tangle-free? These hanging organizers come in various shapes and sizes and quirky designs, allowing you to customize your closet space according to your needs and how your decor wants. They are not only practical but also add a touch of organization and style to your closet while keeping it clean and making everything easier to get when needed or to show to someone giving you a simple small closet DIY idea.

Let’s Hang Them Now

3. Shoe Wall: Day and Night Shoes Should Have Their Own Space

Mount an IKEA Shoe Storage unit on the back of your closet door or wall. This will keep your footwear collection organized and within reach. Not only will this shoe wall save up some space, but it will also allow you to easily see and select what pair you want to go on with your day, giving you an easy and budget-friendly small closet DIY idea. Additionally, you can customize the shoe wall by adding labels or dividers to enhance the organization of your collection further while keeping your closet clean from dirt and mud and giving extra space to work with.

Day and Night Shoes Should Have Their Own Space

4. Curtain Rods: Working in The Clouds

Attach IKEA curtain rods inside your closet to hang purses, ties, or even jewelry, making it ideal for small closet DIY ideas. This simple IKEA hack not only increases the amount of space in your closet by separating the two areas but giving you additional space to work with while keeping your accessories organized and easily accessible. Apart from this, you can easily customize the height and arrangement of the curtain rods to accommodate different sizes and types of items.

https://wordhtml.com/

5. Drawer Dividers: Divide and Conquer

How about installing IKEA drawer dividers to separate socks, underwear, or accessories? This will save you time and eliminate the frustration of digging through messy drawers. Drawer dividers are a useful helping hand for organizing and separating items within a drawer. They not only maximize space but also prevent items from becoming a jumbled mess in your closet. You can use this fun small closet DIY idea in your kitchen, office, or bedroom. This small closet hack creates a neat and orderly space in any place.

Divide and Conquer

6. Belt Hanger: Another Thing to Hang

Use an IKEA belt and tie rack inside your closet to hang belts neatly. This will also help prevent them from getting tangled. IKEA’s belt and tie rack DIY idea for small closets can be a great solution for organizing ties as well. It provides individual hooks for each belt, allowing easy access and visibility. Additionally, the compact design of the tie rack ensures that it doesn’t take up much space in your closet while keeping lots of things hassle-free.

Another Thing to Hang

7. Hooks: Convenient Space for Handbags

Place IKEA hooks on the inside of your closet door or walls to hang robes, jackets, or handbags. Additionally, installing hooks on the walls of your bedroom or closet can provide a convenient spot to hang handbags, keeping them easily accessible or organized. An example of this sneaky small closet DIY idea is you can install hooks on the inside of the door to hang your frequently used jackets or robes, freeing up precious space on the clothing rod and giving you extra space to hang your wrinkle-free shirts.

Convenient Space for Handbags

8. Legging Organizer: Even Legs Need a Space to Breathe

Legging Organizers are secret small closet DIY idea ninja techniques that have been passed down from generation. Use an IKEA pants hanger with multiple clips to store leggings, tights, or stockings. This will keep them wrinkle-free and easy to locate. On top of that, the legging organizer can help save space in your already space-deprived closet as it allows you to hang multiple pairs at once, and that too on one hanger. This practical solution ensures that your leggings remain neatly organized and readily accessible whenever you want them.

Even Legs Need a Space to Breathe

9. Cube Storage: Not the K-Pop Company

Another sneaky DIY idea for small closets is IKEA cube storage units to store folded clothes or accessories. Label each cube to find what you need and how you need it easily. By doing this, you can easily sort through your things without worrying about losing them or not finding them on time. For example, you can put your socks, foot warmers, and stocking in one and name it footwear hence, keeping it sorted when you need it for a get-and-go.

Not the K-Pop Company

10. Display Jewelry: Let’s Put It on The Show

Hang an IKEA pegboard inside your closet to showcase your jewelry collection. This will add a decorative touch while keeping your accessories organized. Not only will this small closet DIY idea create a visually appealing display, but it will also make it easier for you to find and select your perfect piece to complete your look. Also, you can customize the pegboard by adding hooks or small shelves to accommodate different types of jewelry like necklaces, earrings and etc.

Let’s Put It on The Show

11. Scarf Hanger: A Separate Haven

Just like a tie and belt rack, hang an IKEA hanger with multiple loops to neatly organize your scarf collection. This simple yet efficient closet DIY idea will not only save space in your closet but also make it easier for you to find that perfect scarf that will pull your outfit together. The loops on the hanger allow you to hang multiple scarves in a clean and organized manner, keeping them wrinkle-free and ready to go when needed and making sure they don’t get lost in the rest of your things.

A Separate Haven

12. Tie Display: Why Should Jewelry Have All the Fun

Install an IKEA tie hanger to hang and display your marvelous collection of ties. It will make selecting the perfect accessory like walking in a park. A tie display is a device used in retail stores to showcase different styles and colors of ties doesn’t mean it can’t be a nice addition to your space, making it a box DIY for a small closet in your home. It typically consists of rotating stands with hooks and clips where the ties can be hung easily, allowing you to choose and style your outfit accordingly.

Why Should Jewelry Have All the Fun

13. Handbag Organizer

This will keep your purse in pristine condition and easily accessible while giving you a pocket-friendly small closet DIY idea. For example, you can hang the IKEA handbag organizer in your closet and use it to store your collection of designer handbags. Each purse can have its own compartment, preventing them from getting scratched or damaged. When you need to switch out your handbag, you can easily scan and choose your next one and get on with your day.

Handbag Organizer

14. Accessory Tray: Choose Like in The Movies

Place a beautiful IKEA tray on a shelf or in a drawer to keep small accessories like watches, sunglasses, or hair ties organized, creating a perfect closet DIY idea. The accessory tray is a convenient addition to any wardrobe with space issues. It provides a designated area to store small things such as hoops, pins, hair accessories, safety pins, and other accessories, keeping them within easy reach. This not only helps to declutter your closet but also helps you to save your precious time, making it a perfect small closet idea to keep your beautiful accessories safe and sound.

Choose Like in The Movies

15. Customize Closet Lights: Your Life is Not Dark

Install IKEA LED light strips or motion sensor lights inside your closet for better visibility. It might not seem like a small closet DIY idea that can help, but this will make finding items a breeze while making things more organized, creating space that would have been lost if things had been unorganized. Not only will the installation of IKEA LED light strips or motion sensor lights inside your closet enhance visibility, but it will also add a dimension along with modernity to your space. Say bye-bye to fumbling in the dark and welcome a stylish and functional solution for organizing your belonging.

Your Life is Not Dark

16. Picture Ledges: You Can Hang Other Things as Well

An out-of-the-box small closet DIY idea is installing IKEA picture ledges inside your closet to display shoes, handbags, or other decorative items. For example, a person can install IKEA picture ledges inside their closet to create a stylish and organized shoe display. They can use the ledges to showcase their favorite pairs of shoes, making it easier to find and choose that oh-so-picture-perfect pair for any outfit for any occasion.

You Can Hang Other Things as Well

17. Vanity Mirror: Beauty is important

Mount an IKEA vanity mirror inside your closet to create a mini dressing area. This allows you to try on outfits and make-up with ease. Not only will this save space in your bedroom, but it will also provide a convenient and organized spot for getting ready each day. This will also keep your make-up organized without losing a single Lipstick, gloss and etc., making it the best DIY idea for a small closet to keep your make-up organized.

Beauty is important

18. Hangers with Clips: If You Like It, Then Clip It

Invest in IKEA hangers with clips to hang pants, skirts, or shorts. This will prevent them from getting wrinkled and save space. Additionally, the clips on these hangers provide a secure grip, ensuring that your garments stay and don’t slip off. Not only this DIY small closet idea makes your small closet organized, but it will also make it easier to find and select the perfect outfit without any hassle. Hangers with clips is one of the best solutions to make use of your entire wardrobe.

If You Like It, Then Clip It

19. Stackable Boxes: Just Like Pizza Boxes

Use IKEA’s magnificent stackable storage boxes to organize smaller items like accessories, socks, or lingeries. These boxes can be easily stacked and labeled for effortless organization, making them an incredible closet DIY idea. Let’s say you decide to use them to organize your jewelry collection. They can label each box with categories like necklaces, earrings, and bracelets, making it easy to find and access a specific piece. Stackable boxes come in various shapes and sizes depending on your preference and space.

Just Like Pizza Boxes

20. Label Everything: Everything Shouldn’t Be Expensive

Who said sorting and organizing should be expensive and time-consuming to do? Use IKEAS’s label to identify the contents of each storage bin or drawer clearly. This will save you time and ensure everything has its designated space, making it the perfect DIY small closet idea. Not only will labeling everything help you stay organized, but it will also make it easier for others to find what they need without any confusion. Fun tip, consider using color-coded labels to streamline the organization process further and make it visually appealing.

Everything Shouldn’t Be Expensive

21. Foldable Laundry Basket: Think Outside Your Closet

Small closet DIY ideas are not only restricted inside the closet but can take you outside of it as well. Like IKEA’s laundry basket, which can help you by keeping all the dirty or extra clothes off the floor and that closet. It can easily be stored when not in use. This hamper is not only practical but also pace-saving. Its collapsible design allows you to effortlessly tuck it away in a closet or under the bed, maximizing your living space.

Think Outside Your Closet

22. Underbed Space: Clothes Can Keep Company to Monsters

Make use of the space under the bed to increase storage in a small bedroom and closet, giving you a hidden small closet idea DIY. Place bulky items or out-of-season clothing in IKEA’s under-bed storage boxes. Thus, valuable wardrobe space will be fired up. This frequently ignored space can offer plenty of space for storage. You can keep out-of-season clothes, even shoes, under it. Depending on your requirement and preferences, there are a number of ways to make the most of this closet hack.

Clothes Can Keep Company to Monsters

23. Over-The-Door Storage: Be on Cloud 9

In a closet, the thing that occupies your space the most is your everyday wear shoes, but a simple DIY idea for a small closet for them is this IKEA’s over-the-door shoe organizer to store shoes. These organizers can easily hold your day-to-day wear shoes, making sure to give your closet ample space to keep your things while also keeping your precious and expensive shoes safe and sound. This would keep your everyday shoes organized and easily accessible when you are ready to head out.

Something is Meant to Be Kept Open

24. Ironing Station: Something is Meant to Be Kept Open

Create a mini ironing station by incorporating an IKEA ironing board that folds down from the wall or attaches to the inside of your closet door. This space-saving solution allows you easily access the ironing board whenever needed without taking up valuable floor space, making it an easy small closet DIY idea by your bed. This board can also help by keeping your day-to-day clothes that are ironed and ready to use without wrinkling them.

Keep Things Sorted

25. Clear Storage Bin: Keep Things Sorted

Make use of IKEA Clear storage bins for storing items that are not frequently used, like out-of-season clothes or shoes that you don’t wear anymore, creating a perfect DIY idea for a small closet. This will allow you to easily see what is inside each bin without looking inside it at all. For example, you can use these bins to store your winter coat collection, and on special occasions, you can take out your perfect coat by rummaging through multiple opaque boxes.

Keep Things Sorted

Some More Tips and Tricks to Get the Best out Of Your Closet

26. Remove the Door: Let It All In

If you have a small closet in your room and because of the door makes it feel cramped, tight, and hard to fit things in, remove the door or make it a pocket door. By doing this, your closet will look a little bigger, and things won’t feel like their life is being squeezed out.

Let It All In

27. Internal Divider: Use Every Nook and Cranny

Try using every nook and cranny of the closet by adding trays or dividers. Add hanging drawers in small areas or add a shelf to make use of everything a closet has to offer.

Use Every Nook and Cranny

28. Use a Rack: Some Things Should Be Left Outside

A freestanding rack is a lifesaver for those who have a small closet that is filled up to the brim. With your wardrobe being exposed, it’ll make you keep your rack all clean and organized.

Some Things Should Be Left Outside

29. Wicker Basket: Vintage meets Modern Design

Beautiful finishes and made of solid materials, these woven wicker baskets keep your things nicely tucked away without compromising your interior or decor. At the same time, enjoy something that is out of the ordinary.

Vintage meets Modern Design

30. Use Your Furniture: A Little Twist to Normal

Use already existing furniture in your house and give it a spin by adding an extra drawer or a small storage box to keep that extra stuff hiding back in your already-filled closet.

A Little Twist to Normal

Summary

Wardrobes and closets are something that we go through them every day while looking for clothes, shoes, or any other thing, and seeing a cluttered room can completely ruin our mood.

While thinking that organizing and maintaining a closet can be tough for one that is quite small but it doesn’t mean that it should stop you from having a Pinterest-worthy closet that is beautiful, functional, and practical.

IKEA offers plenty of options that can make your ideal wardrobe that can be part of your day-to-day life without bothering you in any way or form. A budget-friendly, pocket agreeing closet should be part of everyone’s life, making getting ready an experience that makes them happy.

With these 25 IKEA-friendly small closet DIY ideas, why not stop by your nearest IKEA and get what you need and get started on creating your favorite spot of your house and enjoy getting ready in the morning?

The garage is a space owned by cars or motorbikes earlier, and they had space for storing a limited amount of things. But this is not the case now as the garage is a space where a person shows his DIY skills as well as store other stuff.

For a person who likes artistic things as well as is passionate for is passionate about his garage, then a cluttered garage can be a headache for them.

For rescue comes a DIY garage Sselves that provide organized and accessible storage space. These DIY garage shelves are needed to manage tools, equipment, and various odds to be stored in the right place, which makes work efficient and easy.

Thus, in this article, we have mentioned 13 creative and practical DIY garage shelves with plans that will help you transform your garage into a well-organized haven.

Easy DIY Garage Shelves Ideas for Better Organizing

1. Simple Plywood Shelves

Simple Plywood Shelves.jpg

The simple plywood shelves plan offers a straightforward yet highly effective solution for organizing your garage space. Using readily available plywood sheets and sturdy brackets, this DIY garage shelves project is accessible to both beginners and experienced DIY enthusiasts. The design involves cutting the plywood into desired shelf dimensions and attaching them to the wall with brackets, ensuring a secure and reliable foundation.

These shelves are versatile, capable of accommodating various items such as tools, paint cans, gardening supplies, and more. The beauty of this plan lies in its adaptability; you can customize the shelf heights and widths to suit your specific storage needs. With minimal effort and cost, you can transform your cluttered garage into a well-organized haven by following this practical and functional plywood shelf plan.

2. Overhead Hanging Shelves

Overhead Hanging Shelves.jpg

This DIY garage shelves plan takes advantage of the often underutilized vertical space, allowing you to reclaim valuable floor area. By suspending sturdy wooden platforms from the ceiling, these shelves provide a smart solution for housing lightweight items such as seasonal decorations, camping gear, or seldom-used tools.

Not only does this design maximize storage capacity, but it also enhances accessibility, as items can be easily retrieved or stowed away without impeding your workspace. Embrace the art of efficient organization with these overhead hanging shelves, offering a sleek and practical way to optimize your garage layout and keep your belongings within reach yet out of the way.

3. PVC Pipe Organizers

PVC Pipe Organizers

This is a creative garage shelves idea and requires minimum materials as well. All you need is to transform ordinary PVC pipes into an extraordinary storage solution with this innovative DIY garage shelves plan. Say goodbye to the jumbled mess of long-handled tools cluttering your garage floor. By crafting custom compartments from PVC pipes, you create a systematic way to keep your rakes, shovels, and brooms neatly arranged and easily accessible.

This budget-friendly project involves cutting the pipes to desired lengths and mounting them to a sturdy backing board, creating a visually appealing and highly functional storage unit. Embrace the art of upcycling and organization simultaneously by repurposing PVC pipes into a clever storage solution that not only clears your garage space but also adds a touch of creativity to your workspace.

4. Floating Wall Shelves

Floating Wall Shelves

Floating wall shelves as DIY garage shelves are a modern solution for garages that have limited space. However, you can bring an element of modern elegance to your garage with the sleek and versatile design of floating wall shelves. While often associated with interior decor, these shelves find a new purpose in the garage, providing a stylish solution for storing smaller items and tools.

Crafted from sturdy materials and attached securely to the wall, these shelves seemingly “float” without visible brackets, creating an illusion of space while maximizing storage potential. These shelves are perfect for holding frequently used tools, automotive supplies, or even showcasing your collection of DIY achievements. Embrace the fusion of aesthetics and functionality as you elevate your garage’s organization game with these visually appealing floating wall shelves.

5. Pallet Shelves

Pallet Shelves

Infuse your garage storage with rustic charm and environmental consciousness by embarking on this type of DIY garage shelf. Reimagining discarded wooden pallets as functional shelving units not only reduces waste but also adds character to your workspace. After a bit of sanding and creative ingenuity, these pallets can be transformed into sturdy platforms for storing heavier items such as power tools, paint cans, or gardening supplies.

Embrace the opportunity to personalize your pallet shelves with a coat of paint or a weathered finish, giving your garage a unique and eclectic touch. By repurposing pallets into garage shelves, you’re not just organizing your space; you’re also making a statement about sustainable living and resourcefulness.

6. Ladder Shelves

Ladder Shelves

A ladder is supposed to take you to an elevated space, but these ladder shelves will take your garage space to an elevated sophistication. Moreover, you can infuse these DIY garage shelf plans into your garage space as it will add both functionality and aesthetic appeal. A ladder’s natural design lends itself perfectly to creating tiers of storage, making it an ingenious choice for organizing tools and supplies. With a little creativity, you can repurpose an old ladder into a charming shelving unit that accommodates items of various sizes.

By attaching sturdy wooden planks to the ladder rungs, you can create multiple storage levels for tools, paints, and other garage essentials. This design not only optimizes your storage space but also adds a touch of rustic elegance to your workspace. As you embark on this ladder shelf project, you’re not just organizing your garage; you’re giving new life to a humble ladder and transforming it into a functional work of art.

7. Corner Shelving

Corner Shelving

This DIY garage shelves idea is a storage solution that optimizes every nook and cranny, providing a strategic way to organize smaller items that might otherwise go unnoticed. By crafting triangular or L-shaped shelves that snugly fit into corners, you’re effectively transforming wasted space into a valuable storage haven.

This design is perfect for housing items like spray paints, small tools, or automotive supplies that tend to accumulate but often lack a dedicated spot. Whether you choose to build custom corner shelves from scratch or repurpose existing materials, this project offers a practical way to maximize your garage’s storage capacity while keeping your workspace clutter-free and efficient.

8. Cubbyhole Shelves

Cubbyhole Shelves.jpg

Elevate your garage organization game with the strategic and compartmentalized design of cubbyhole shelves. This DIY garage shelf offers a unique solution to keep various items neatly organized within separate compartments. By constructing a series of open boxes or cubbies, you create designated spaces for different categories of tools, hardware, or supplies.

These shelves can be tailored to your specific needs, with larger cubbies for bulkier items and smaller ones for tiny components. Incorporating dividers or partitions within the cubbies further enhances organization and prevents items from mingling. This design not only provides a practical way to maintain order in your garage but also offers a visual appeal that turns your storage area into a showcase of tidiness. Dive into the world of cubbyhole shelves and experience the joy of efficient organization as you create a well-structured and easily accessible storage solution for your garage.

9. Pegboard Wall System

Pegboard Wall System

The pegboard wall system transforms your garage walls into a dynamic storage area, which makes working there convenient. Also, you can hang tools, other equipment, and supplies hang in perfect sync and harmony. All you need to do is mount a sturdy pegboard onto your wall; you create a platform for arranging hooks, brackets, and shelves according to your needs. The beauty of this design lies in its adaptability; as your storage requirements evolve, you can easily rearrange the components for optimal functionality.

From wrenches to gardening gloves, everything has its designated spot, preventing clutter and facilitating quick access. The pegboard wall system not only offers efficient storage but also serves as an inspiring backdrop that reflects your well-ordered and dynamic approach to DIY projects. Embark on this project, and watch your garage transform into an organized and visually engaging workspace.

10. Tire Rack Shelves

Tire Rack Shelves.jpg

If you have an interest in automobiles and their parts, then you should definitely try these DIY garage shelves for your space. The tire rack shelves offer a specialized storage solution that blends functionality with a touch of automotive flair. This DIY project is tailored to keep your seasonal or spare tires neatly organized and off the garage floor.

By crafting a sturdy frame and incorporating horizontal bars, you create a secure platform for stacking and storing tires. This design not only preserves the quality and condition of your tires by preventing distortion but also frees up valuable floor space. Whether you’re a weekend warrior or a racing fan, these tire rack shelves cater to your automotive needs while enhancing the overall organization of your garage. Embrace this project to ensure that your tires are always ready for the road, neatly displayed as a testament to your automotive passion.

11. Rolling Shelves

Rolling Shelves

This DIY project takes traditional shelving a step further by incorporating wheels, allowing you to effortlessly move heavy tools, equipment, or supplies as needed. By constructing a sturdy frame and attaching industrial-grade casters, you create a set of shelves that can be easily maneuvered around your workspace. This design is particularly beneficial for accommodating large or bulky items that might otherwise be challenging to access or reposition.

Whether you’re working on a home improvement project or need to clear space for a temporary task, rolling shelves provide a dynamic solution that adapts to your ever-changing needs. Experience the liberation of an organized garage that’s not bound by static storage solutions as you embark on this project to create rolling shelves that bring flexibility and efficiency to your workspace.

12. Recycled Door Shelves

Recycled Door Shelves

As the name suggests, this DIY garage shelve is an eco-friendly option for your garage space. Moreover, it breathes new life into discarded doors, transforming them into eye-catching storage units. By attaching brackets or sturdy supports to the door’s frame, you create a platform for shelving that can hold tools, paints, or various supplies.

The flat surface of the door provides ample space to display and organize your belongings, while the distinct character of each door adds a distinctive charm to your garage’s ambiance. Embrace the art of upcycling as you reimagine doors as versatile storage solutions, not only decluttering your workspace but also contributing to a more environmentally conscious lifestyle. Dive into this project to craft recycled door shelves that serve as functional and decorative pieces in your well-organized garage.

13. Cabinet Style Shelves

Cabinet Style Shelves.png

Cabinets are the basic shelves that are present in every household and are quite useful. Moreover, it is also not very difficult to deal with or to make it. This DIY garage shelf is functional and does not require a lot of creativity, making it easy to create and store a lot of stuff. By crafting wooden cabinets with hinged doors, you create concealed storage spaces for items you’d prefer to keep out of sight.

This design not only streamlines the visual appeal of your garage but also offers protection from dust and dirt. Whether you’re storing power tools, automotive fluids, or hobby materials, cabinet-style shelves provide a sleek and organized way to house your essentials. As you embark on this project, you’re not just creating storage; you’re adding a touch of sophistication to your garage’s ambiance, turning it into a space where form and function harmoniously coexist.

Conclusion

Shelves are the basic necessities of any house, and when you are planning to have DIY garage shelves, then you need to be very specific.

This is because the garage has a lot of usage other than holding space for cars. Thus, well-organized DIY garage shelves are essential for efficient working and easy access to tools and equipment.

However, we have mentioned these unique 13 DIY garage shelf plans that offer a range of creative and practical solutions to help you declutter and transform your garage into a functional and organized space.

Above all that, messy garage space is a headache as we all need systematic space to work, and if you want a non-messy space, then you have to work for it.

Decorating a kid’s room holds a different place for every parent. If you are a new parent, you might be aware that designing the room for your infant or your grown kids takes a lot of effort. There are so many elements that are important to take into consideration. One such element is a nursery dresser.

Nursery dressers are furniture with drawers, shelves, and a changing tabletop sometimes. The design and features of all the nursery tables are different. It depends on whether you are choosing the classic style, a traditional one, some contemporary designs, or some modernized one. If you are looking forward to getting one for your kids’ room, you must pay attention to the theme of the room.

If you are unsure about the ideas you can consider, keep reading until the end. In this article, we share the best nursery dresser Ideas for 2023.

Let’s have a look!

Best Nursery Dressers Ideas in 2023

1. Classic White Elegance

If you want to go with something with minimal design, choosing a white dresser with clean lines and classic hardware is best to consider. It does not only complement the nursery theme but will never let you feel like you have chosen something that is out-of-the-box. The classic white dresser is also best to consider if you have not finalized any theme for the kids’ nursery.

Classic White Elegance

2. Rustic Charm

To be more on the warmer side, choosing A distressed wooden dresser is best considered. This rustic charm will add another element to enhance the overall interiors of the room. You can easily occupy the top of this dresser with some other elements to make it look more appealing.

Rustic Charm

3. Minimalist Modern

You will find out some dressers with geometric shapes and neutral tones. These are more in consideration to create a contemporary look. If you are searching for nursery dresser Ideas that will gel up with your house’s overall interior, then choosing the minimalist dresser with the geometric shape is best. You can find them in different shades, including white, black, rustic brown, and so on.

Minimalist Modern

4. Space-Inspired Dresser

A Space-inspired blue color dresser will never go out of trend. If you choose it with a space theme, it will be a perfect blend for a space-inspired nursery. You will find out different Navy-blue color options available, but choosing this particular one can enhance the looks and give the room the perfect look you always wanted.

Space-Inspired Dresser

5. Pastel Palette

When considering nursery dresser Ideas, how can we forget to consider pastel colors? The use of pastel colors is highly in trend. Majorly people are happy to consider mint green, blueish, pink, or baby blue for a soothing and delicate atmosphere. As we all know, we cannot occupy the surroundings with something that is not good for the eyes. In that respect choosing these special colors is the best option.

Pastel Palette

6. Animal Drawer Pulls

Animal drawer pulls never go out of trend when designing a nursery for children. With the available nursery drawer integrating these animal drawer pulls are best. These come in different cute shapes; accordingly, you can choose the one. These will go with the theme of the room to the fullest because, for every nursery, there is a different element we want to add on, and these will act as that different element to the room.

Animal Drawer Pulls

7. Convertible Dresser-Changer

There are so many nursery dressers available with a changing table as well. This will save space and provide practicality as well. These come in different shades, including black, classic white, and so on, and you can choose the one that goes well with the surroundings. Investing in a convertible dresser changer will also save a lot of money because, as we all know, getting something specifically for changing addresses will turn out to be an expensive affair.

Convertible Dresser-Changer

8. Muted Earth Tones

When finalizing the color theme for nursery dresser Ideas, always choose something that goes well with nature. Choosing earthy tones like olive green, terracotta, or sandy beige will create a calming ambiance. We never want our kids to get surrounded by something that can affect their mental health. In that case, choosing these muted earth tones is best to consider.

Muted Earth Tones

9. Whimsical Wonderland

Adding a Wonderland touch to a room is also one of the best and quite imaginative approaches and best nursery dresser Ideas. For that, you need to put in little effort because, under this condition, you need to occupy the room with hand-painted designs such as clouds, stars, or fairy tale characters. If you are not good at drawing, there is no need for you to worry about it because there are hand-painted drawings available that one can consider.

Whimsical Wonderland

10. Under the Sea

Choosing Sea themed nursery dressers is also an imaginative approach. You will find out nursery dressers with the same look. Some nursery dressers are available with the ocean-theme details like seashells, waves, or fish, and sometimes you find something with the same tone as the Sea. If you cannot find it, don’t worry because different products are available to decorate the surroundings in the same way. There will be no need for you to end up with something that is not going as for the interiors of the room and As for the imagination you have for it.

Under the Sea

11. Fairy Tale Fantasy

If you are designing a room for a girl, choosing a fairy tale fantasy design is the best to consider. You will find out nursery dressers in the same shade as in the fairy tales. You can also occupy the surroundings with some creatures that are of elegance to the room. Also, some options are available to decorate the room’s walls. Make sure to choose those elements that go well with the nursery dresser you are choosing.

Fairy Tale Fantasy

12. Space-Saving Solutions

If your room has insufficient space, choose a drawer that can save some space. You can choose a tall, narrow dresser with minimal design in this condition. There will be no need to invest in big nursery dressers if the space is less. Make sure to accommodate the surroundings with those products only that will not cause space issues after installation.

Space-Saving Solutions

13. Elegant Embellishments

If you are looking forward to something elegant for the surroundings, then choosing this dresser with intricate carvings or details is best to consider. For that, you need to do a little research because finding out something with intricate design is not so easy. But after installing these in your surroundings, you will feel like you have invested in the right product.

Elegant Embellishments

14. Bold Monochrome

Some so many people want to go with bold monochrome when it comes to finalizing the nursery dressers. In that condition, you can contrast the overall theme of the room with some bold shades, including black. Having a black dresser against a lighter surrounding hit differently. This will get added as an element of sophistication to the room.

Bold Monochrome

15. Industrial Chic

If you already have a nursery dresser, then renovating it can help you out. We consider you to incorporate some metal and wood elements to have an industrial-themed nursery dresser. The major idea behind having an industrial-themed nursery is to keep the kid always motivated and let them know that sky is the limit.

Industrial Chic

16. Cute and Cartoonish

Adding on cartoonish characters will never go out of trend when you are designing a child-friendly space. You can choose a dresser with a cartoon theme. In case you cannot find it, some elements are available to add to the same touch. You can get some products from local stores to renovate the available nursery dresser.

Cute and Cartoonish

17. Neutral Chic

If you want a sophisticated and versatile look for the surroundings, choosing A neutral-toned dresserwith a textured finish will never go out of trend. This will always complement the décor no matter in which age you have entered. There are different colors available under neutral-toned shades, and you can go for any of them.

Neutral Chic

18. Geometric Patterns

This is something different because we are not telling you to get a particular dresser here. But with the available dresser, you can incorporate some geometric patterns with the help of paint or stencils. You can give it a modern or artistic touch as well.

Geometric Patterns

Factors to Consider While Purchasing a Nursery Dresser

When you are moving ahead to purchase a nursery dresser or invest in nursery dresser Ideas, there are certain factors that you need to keep in mind. These are as follows:

1. Quality and Durability

The primary factor that you need to keep in mind is to invest in a well-made nursery dresser. If you are investing in something with bad construction and no finish, you will end up with a bad investment only. Check out whether the product you are choosing is long-lasting or not. You will find out solid wood dressers as well, and these are more durable than particle wood or MDF board dressers.

2. Safety

You cannot compromise safety at all. Always choose those nursery dresser Ideas that fulfill the current safety standards. Along with that, make sure the dresser you are choosing is stable and has all the features like entity hardware to prevent tipping accidents. It is important to consider because when your child is growing and become more mobile, they will start exploring the stuff in the surroundings, and if the same is not safe, they will harm themselves and return.

3. Size and Space

You cannot accommodate the surroundings with something which is not of the best size for it. Measure the available space in the nursery before you finalize the dresser. The racer you are choosing must fit the surroundings comfortably without crowding the room. You can keep the dimensions of the dresser into consideration, including height, width, and depth, while finalizing the dresser.

4. Storage Needs

It is not necessary that the dresser you are choosing will fulfill all your storage needs. But it must fulfill the maximum of your needs. Analyze your storage needs and dresser capacity completely. You need to finalize the number of drawers that you require for storing baby stuff, including clothes, blankets, diapers, and other essentials. Do check out whether the drawers of the dressers are spacious or not. Also, check out whether the drawers glide smoothly or not.

5. Functionality

We all love to have products with dual functionality. You can consider a nursery dresser Idea with changing table on top or a separate changing station. It will not only save an amount but will also save some space in the surroundings. The dressers also come up with adjustable shelves or removable dividers. You can also go for them because this can allow you to customize the storage space as per the requirement.

6. Style and Aesthetics

You cannot compromise with the style and aesthetics of the drawers you are chosen. Always choose something that goes well with the surroundings. It is totally on you whether you prefer a classic modern or a rustic look dresser, but make sure it aligns with the theme of the room and the vision you have for it. If it is something that goes out of the box, you will not like to have it for a longer duration, and ultimately, you have to change it.

7. Budget

Last but not least, you also need to take the budget into consideration. Always set up a budget for the dresser and stick to it. But the budget does not compromise its quality and safety at all. You will find out nursery treasure options available at various price points, and you can research brands and models accordingly.

Conclusion

In conclusion, finalizing nursery dresser Ideas may be problematic sometimes, but with the right research, you can choose the best one. It is advisable to keep the décor of the room in mind while finalizing the same. If you do not know which one you can go for, get help from professionals. Some professionals will help you out at every step.

Their best knowledge will help give you insights about a design you are finalizing. Even if you have something to add to the same idea, you can also do that. The designer will pay attention to everything you say and suggest it accordingly.

While finalizing nursery dresser Ideas, it is advisable not to compromise with interiors and not choose something that goes out of the box!

Frequently Asked Questions

Why is a Nursery Dresser Important?

A nursery dresser is an important addition to the surroundings because it provides storage space for baby clothes and other essentials. It will help you to keep the surroundings organized for efficient caregiving.

What are the Benefits of Having a Nursery Dresser?

The major benefit of having a nursery dresser is it will help you to keep all the baby-related items in one place. You will not need to search for different locations to put up the Essentials. Moreover, it also offers a safe changing area that you can utilize. You can also decorate the nursery dresser to give an aesthetic look to the surroundings.

Can’t I Use Regular Furniture Instead of a Nursery Dresser?

Choosing regular furniture instead a nursing dresser can help you out, but it will not have all the features the nursery dresser holds. The major features making the nursery dresser a must-choice include diaper-changing toppers, Shallow draws for easy access, child-safe hardware, and other parameters.

How Does a Nursery Dresser Contribute to Safety?

Nursery dressers come up with all the safety features, including an anti-tip mechanism, round edges, and non-toxic finishes. It contributes to the overall safety of the nursery environment and reduces the risk of accidents.

What Should I Look for When Choosing a Nursery Dresser?

When selecting a nursery decor, the major features to keep in mind include ample storage space, safety features, height suitability, sturdy construction, and the one that complements the overall decor of the nursery.

Is a Nursery Dresser a Long-Term Investment?

Yes, a nursery dresser can be a long-term storage solution even as your baby grows. It can be repurposed for storing toys, clothes, or other items, extending its usefulness beyond infancy.

Laundry rooms are an essential part of the home. After all, they offer the space to clean and reuse your clothes again. But laundry rooms can be aesthetic, creative, and exuberant and reflect different vibes than just a simple room used for washing clothes.

If you think that the laundry room can’t look aesthetic, your laundry space area will always remain a dull workload space.

Now how can you make your laundry space look aesthetic? You can create an aesthetic, creative, or exuberant laundry space area in a small corner with DIY or by picking up a particular theme.

In this post, we have covered 17 small laundry room makeover ideas to help you select the one good idea for your small laundry room. We have covered the pastel tone approach to art, from wall closet DIY to small shelf stack theme.

1. Pastel Tone Laundry Room

Pastel Tone Laundry Room

If you want to create your laundry room or space like a cozy space that doesn’t seem like a hectic workload space, opting for a pastel theme is worth trying at every cost. You can use beige or pastel pink colors on the cabinets or wood shelves to make it light and warmer. Use a light color like white or cream for the counterparts and walls.

While organizing the laundry room or designing the interior, please don’t consider it like the cleaning room only. This different approach will help you to make it a light space, and your laundry room will also stand out like the other rooms of your home, like in this image by Paul Dyer.

2. Rod Installation Laundry Room

Rod Installation Laundry Room

If you want to create the laundry space in the Bathroom itself, this rod installation DIY idea is for you. Above the leftover space of the washing machine and between the other washroom utilities, horizontally install a long rod for hanging clothes.

If the rod is long enough, you can create the separation by the stopper or decorative hangers to categorize it into parts for different purposes, like half side to hang clothes you will wash. And on the other half side, you can hang the clothes after washing and cleaning. You can install double rods to create more space with the rod installation. You can use the designer hangers on the rod for a creative touch.

3. Add Fabrics in The Laundry Room

Add Fabrics in The Laundry Room

If you want to make your laundry room creative and don’t mind using textiles, this Laundry room theme is for you. Add the fabrics in the laundry room to create fresh, new, and vintage vibes. You can use a pattern or flower-based fabrics to cover the laundry walls and designated areas like cabinets and doors and utilize them as the curtain, as shown here in the image by Carmel Brantley.

If you don’t want to use much fabric, you can use a similar theme wallpaper to cover the walls of your laundry room for better creativity and avoid fabric cleaning tasks.

4. Industrial Chic Utility Room Ideas Small Laundry

Industrial Chic Utility Room Ideas Small Laundry

If there is space like industrial chic storage in your room or washroom, you can easily convert it into the laundry room by DIY. Use a rollout shelf and convert it into an aesthetic closet, so you can easily hide it when you don’t need it or when the laundry is done.

The good thing about this rollout shelf is you can utilize it after washing clothes, like folding or ironing them over the rollout shelf. You can keep the dry folded clothes, laundry detergent, or linen clothes on the smaller and higher shelves. Since the rollout shelf goes from ceiling to floor, it will save lots of ground space and is the perfect utility room idea for small spaces and easy DIY tips.

5. Pop Color Utility Room Ideas Small Laundry

Pop Color Utility Room Ideas Small Laundry

This pop-up theme is for you if you want to make your laundry space interesting and exuberant instead of tough task vibes. Add the vibrant color splash in the cabinets of your laundry room, as shown in this image by Purple Cherry Architects. If you use a closet DIY laundry space, paint the closet cabinets or drawers with a vibrant or pop color to bring an exuberant look.

This pop-up touch with color splash will make your laundry space warmers, and make it creative and interesting, to ease off the heavy working load. Balance the overall laundry room look with light-tone colors like white or the faintest shade of blue to paint the leftover space.

6. Organizational Utilties Room Ideas Small Transformation

Organizational Utilties Room Ideas Small Transformation

If you want to create more organizational utility room ideas for small laundry transformation, this idea is for you. You can incorporate canvas storage laundry baskets in your laundry room. If you don’t want to DIY, you can buy them. If you are looking for affordable ideas, you can easily DIY them.

Pick up a rolling stand. Use an old clean blanket to wrap around it and cover it from all four sides and the base area. Use the hooks or create them with the rope piece by fixing them with the blanket with thread and needle or hand stitching machine to make it easier to carry or move the canvas basket, and your canvas laundry storage basket is ready.

7. Artistic Flair Touch Laundry Room

Artistic Flair Touch Laundry Room

An artistic laundry room is suitable and possible if you design it professionally instead of creating it with a DIY. So it will be a little costly and need the professional help of architecture. Create the space in the laundry room for proper and more than enough lighting so it will be easier to dry the clothes quickly.

You can use the big glass windows to make it easier to light the entrance and take the help of curtains to add a privacy touch when you are working or loading the laundry. Use the shiny backsplash tiles, as shown here in the image by Lisa Frantz, for maximum light reflection in the laundry room itself.

8. Utility Room Ideas Small Built-In Cubbies

Utility Room Ideas Small Built-In Cubbies

If you want to dedicate a smaller area for the laundry service or room, this Cubbies DIY idea is for you. Keep the washing machine in the lower part to make it easier for you to do cleaning and washing. For the upper leftover space, fix the built-in cubbies so you can utilize them for multiple purposes.

Installing smaller and multiple storage cubbies can increase the storage capacity and save ground-level space. Also, you can easily store laundry detergent or clothes before or after the laundry in the cubbies as per your comfort.

9. Utility Room Ideas Small DIY Partition with Curtains

Utility Room Ideas Small DIY Partition with Curtains

If you are looking for an affordable idea and where you need less effort in the DIY process, this curtain theme is worth trying. This will go well if you don’t want to create a separate laundry room or don’t want to invest in the door of the laundry room. You can easily convert an old closet into a laundry space. And use the curtains to create the separation in your room, instead of using a door or leaving it open.

Use the tension curtain rod to hand the curtains so that it will be easier to open and close them. It will save money as the curtains are much cheaper than wood planks or door installation. And it will also not affect the beauty of your roof, as the curtains will act like the aesthetic or creative soft wall.

10. Utility Room Ideas Small Wall Closet

Utility Room Ideas Small Wall Closet

If you want a hide-and-seek laundry space theme, this wall closet idea is for you. You can easily store the washing machine or laundry loaders in them. The wall closet will work like a hidden secret space for your laundry room. Use the upper space to hang the clothes.

You can install the handles and rod in the wall closet to create more storage space. Like to store laundry detergent, fix a drawer in it. Use one more rod to hang the clothes. And the best thing about the wall closet laundry space is that it will not affect your home’s aesthetic.

11. Black And White Laundry Room

Black And White Laundry Room

Adding a contrasting touch in a working space is the easiest way to start the work or DIY or design repurposing. The issue with the patterns and other designs is that you will need to use your brain so much about the color combination, what will look good, and so many other factors are there. Black and white laundry theme makes it easier for you, and your laundry room no longer looks like a laundry room.

Paint the cabinets in black, and keep the laundry room walls in white paint. If you will add tiles, keep them in solid white instead of patterns, as shown here in the image by Morse. Use the wooden accent or brown paint on the countertops of cabinets for a bold touch.

12. Utility Room Ideas Small Laundry Space

Utility Room Ideas Small Laundry Space

This idea is for you if you want to create unique utility room ideas for small storage laundry spaces. You can easily convert a small or narrow shelf into a laundry space. For this theme, your washing machine and dryer should be stackable and have a flat bottom area; otherwise, loader sitting might damage the laundry machine.

You can easily fit the washing machine loader and clothes dryers in two sections, one by one, where one is at the bottom and another on the top. It will help you to save enough ground space. And the flat bottom surface of the laundry machine will ensure safety and prevent slippage. Keep the water valves on the back side and create room for installation via the accessible panel and adjacent joint cabinet or closet.

13. Master Closet Laundry

Master Closet Laundry'

Repurposing the master closet with some easy DIY steps can help you create a brand-new laundry room for your laundry. As usual, keep the lower part for the laundry loader and dryer. Install a rod in the upper part for multiple purposes. Especially you can use this rod to hand the clothes before washing or to dry them.

The great advantage of converting a master closet into a laundry room is that you don’t need to hide it. It will give attractive vibes instead of creating a dirty or dull look. For a more aesthetic and eye-appealing touch, you can pair the floor rug or tiles with the aesthetic vibes and color tone of your master closet.

14. Special Laundry Storage

Special Laundry Storage

If you want to add a traditional or special touch to your laundry room and storage, this idea is for you. The fabric can cover or redecorate your laundry storage or space space. You can pick a calming tone while selecting laundry devices and storage cover material. Please don’t cover the whole area like people cover their cars after usage.

Cover the bottom parts of only outer boundaries so you can easily use the storage space area or laundry automatic commands while loading or picking up clothes from the washing machine or dryer. This attempt will help you create a mild vintage look in your laundry room and items.

15. Utility Room Ideas Small Shelf Stack

Utility Room Ideas Small Shelf Stack

You can easily convert this theme into your laundry room if you have a top-loading washer. Add a small shelf above the washing loader machine. Use the shelf area to store soap, laundry detergent, and frequently needed accessories. To create this small storage shelf, you can easily DIY it with the help of wood planks. Pick up two wood planks that can be of the same size. If not, it is fine.

Use the larger plank among the two and install it above the washing machine by leaving some gaps. Install the other wood Planck above this plank to create one more storage shelf. You can fix the wood pillars or planks on both sides of these planks as the support system.

16. Laundry Room from Closet

Laundry Room from Closet

If you have an old closet you no longer want to store your precious and new clothes, you can easily convert it into a DIY laundry room. Keep the washing machine in the lower area and do some DIY tasks in the above area of the closet. Install the iron board on the shelf to hold the laundry supplies or baskets.

You can fix multiple iron boards or racks in the closet to create more storage space in less area. Store the laundry detergents in the smaller drawers or iron board cabinets. Use the baskets to store clothes and further organize them on the iron board installed in the closet.

You can also install the iron rod or hooks on the iron board to hang the clothes before or after the laundry.

17. Double Function Laundry Room

Double Function Laundry Room

If you want to create multiple rooms or a high-class custom cabinetry laundry room, this idea is for you. This double-function theme is the most costly one among all the ideas listed here, so go with it only when your budget allows you. Use the custom cabinets to store clothes, laundry items, and supplies.

Insert the washing machine and dryer in the biggest customized cabinet, and it will be easier to complete the laundry task hassle-free. Use the counterparts to keep the frequently used laundry supply like detergent, wiping cloth, soap, brushes, etc. Create a relaxing nook with lower cabinets to relax when the machine works or comfortably fold clothes.

Final Thoughts

Everybody wants to create an exuberant and interesting laundry Space or room that doesn’t seem like an additional workload or dirty area. Using the cozy and warm themes in your laundry area by not considering it just the cleaning or laundry space will help you try the exciting laundry room theme. And using suitable utility room ideas, small laundry storage themes, or DIY ideas according to your requirement and laundry space area will help you achieve the exuberant laundry space look.

This post showed you 17 small laundry room makeover ideas from professional interior setup to DIY and aesthetic to creativity to make things easier. This post has covered a wide variety of laundry space ideas from the pastel tone theme to add on fabric, closet DIY laundry space ideas to curtains, artistic touch, and more so that you can easily pick up at least one theme according to your requirements of a makeover and the laundry space or room type.

If you want more ways to add creativity to your home interior or rooms, sign up and get our best strategies in your inbox.

Curtains are the small decorative elements that you might not have noticed it. However, these plain sheets are not merely decorative elements but also functional addition to any room. Curtains provide privacy and help to dim the light and enhance the overall look of the house. Thus it is necessary to maintain the look of your curtains.

Moreover, when we think of the right curtain lengths, it just strikes in our mind the long curtain sheets draped on the window rack. But this isn’t all. You can assume it is like a pair of pants on our body. A long length pant creates a different look on our body, and short ankle-length pants give a whole new look to our body.

Similarly, the curtain lengths work. Different lengths create a different statement in the house. All this explanation proves why measuring for your drapes and knowing how to measure it correctly is so important.

Standard Curtain Lengths

There are different curtain lengths available in the market, and it is totally dependent on the region, cultural norms, and individual preferences. However, some common standard curtain lengths are widely used and accepted in many parts of the world. We have mentioned some common curtain lengths that are popular worldwide.

  • 63 Inches
  • 84 Inches
  • 96 Inches
  • 108 Inches
  • 120 Inches

However, this does not signify that curtains are available only in these lengths.

Different Curtain Length Options

Further, there are different curtain lengths to consider for your household and when you should use them.

1. Sill Length

Sill Length

Sill-length curtains are designed to reach just below the window sill. They are a popular choice for kitchen and bathroom windows, as well as windows in children’s rooms. Sill-length curtains provide enough privacy while still allowing easy access to the window area. The length of sill curtains typically ranges from 45 inches to 54 inches (114 cm to 137 cm).

2. Apron Length

Apron Length

Apron-length curtains fall slightly below the window sill, typically reaching around 6 to 8 inches (15 cm to 20 cm) below it. This length is a versatile option suitable for various rooms in the house, including dining areas, bedrooms, and smaller living rooms. Apron-length curtains strike a balance between privacy and a more casual, contemporary look.

3. Floor Length

Floor Length

Floor-length curtains are designed to extend all the way to the floor. They are a classic and elegant option often used in formal living rooms, dining rooms, and bedrooms. Floor-length curtains add a touch of luxury and sophistication to the space. When measuring for floor-length curtains, ensure they gently touch the floor or have a slight break to avoid looking too short or dragging excessively. The length of floor-length curtains typically ranges from 84 inches to 108 inches (213 cm to 274 cm) or more.

4. Puddle Length

Puddle Length

Puddle-length curtains, also known as puddled curtains, are a luxurious and opulent choice that exudes elegance and grandeur. Unlike standard curtain lengths that just touch the floor or have a slight break, puddle-length curtains intentionally extend beyond the floor, creating a graceful “puddle” of fabric on the ground. This style is especially popular in formal living rooms, grand dining areas, and lavish bedrooms, where everyone wants that extra touch of elegance.

These curtain lengths are not suitable for all windows, and if you have a unique window design, then you should look out for some other curtains. Custom-made curtains will suit your windows best. However, we have mentioned some curtain lengths that you can look for before you go shopping.

Steps for Choosing the Right Curtain Lengths

Choosing the right curtain lengths is essential for achieving the perfect balance between functionality and style. In this guide, we will walk you through the process of selecting the ideal curtain lengths that suit your needs and complement your interior decor.

1. Decide the Purpose of Choosing the Curtains

Decide the Purpose of Choosing the Curtains

As we mentioned before that, curtains are not only for decoration purposes. They have functionality in the house. Thus, before deciding the right curtain lengths, we need to determine the purpose of the curtains in each room. Do you want curtains for privacy purposes, to block out light, or just for decoration to enhance the overall aesthetics of your house? If you choose the right purpose for your home, then you can choose the right material and then the right length of the curtains.

2. Measuring the Windows

Measuring the Windows

Taking the measurements of your windows where you are going to hang your curtains is very important. This is because then only you will be able to determine the curtains lengths that can fit your window. Accurate measurement is crucial for this purpose. You can start by measuring the height and width of your window.

By Length

You are going to measure the length of the window. However, you need to decide how high you want to mount the curtains that you have chosen. Furthermore, it is common that the curtain rods should be mounted above the window casing. Designers prefer ten inches above the window is good, but it is totally up to you how much you want to place your curtains. Just trust your instincts about what would enhance the overall aesthetics of your house. However, you need to decide the total length of the house from the top to the bottom.

By Width

The width determines how wide your curtains’ lengths will be. Moreover, you need to measure the projection of the curtain rod. While you are measuring the width of the window, you should measure the face of the curtain rod or the aesthetic pole that you have. Also, the projection is considered the distance from the wall to in front of the rod or the pole. Furthermore, while you are measuring the width of the window, then you should extend at least four inches on both sides of the window.

3. Curtain Styles

Curtain Styles

There are so many curtain styles option available in the market which offer standard curtain lengths. However, you can also have cloth and customize the curtain lengths according to your window length and width. We have mentioned some options above that you can choose from for your home. These are as follows:

  • Sill length
  • Floor length
  • Apron length
  • Puddle length

4. Room Types

Room Types

There are different types of rooms in your house serving different purposes, such as the living room, bedroom, kitchen, and bathroom. The type of room you are decorating should influence your curtain length decision. For instance:

  • Living Room: In the living room, you might opt for floor-length curtains to create a sophisticated ambiance. Ensure the curtains don’t obstruct any furniture or heating/cooling vents.
  • Bedroom: Bedrooms often benefit from floor-length curtains for enhanced privacy and light control. Make sure the curtains do not interfere with any nightstands or obstruct access to windows.
  • Kitchen and Bathroom: Sill or apron-length curtains work well in these areas. They offer privacy while maintaining practicality.

Once you have decided the purpose and in which room you are going to place these curtains, then it will be easy for you to determine the right curtain lengths.

5. Types of Curtain Fabric

Types of Curtain Fabric

In order to determine the curtains’ lengths, you need to choose the fabric that you are going to use in your home. The choice of fabric can significantly change the overall look and feel of the curtains.

  • Cotton: Cotton is a versatile and widely used fabric for curtains. It comes in various weights and weaves, offering options for both light and heavy curtains. Cotton curtains are easy to maintain, breathable, and provide a casual, relaxed feel to any room.
  • Linen: Linen is a natural fabric that adds a touch of sophistication and texture to curtains. Linen curtains have a beautiful drape and a slightly rustic look, perfect for achieving a laid-back yet elegant ambiance.
  • Silk: Silk is a luxurious and lustrous fabric that instantly elevates the elegance of any space. Thus, silk curtains bring sophistication, making them ideal for formal living rooms or bedrooms. However, silk requires delicate care and may not be suitable for places that have a maximum number of people.
  • Velvet: Velvet curtains are a classic choice that brings richness and depth to your decor. With their plush texture and excellent light-blocking capabilities, velvet curtains are often used in bedrooms, home theaters, and formal spaces.
  • Polyester: Polyester is a synthetic fabric that is durable, easy to clean, and resistant to wrinkles and fading. It comes in a wide range of colors and patterns, making it a versatile and budget-friendly option for various decor styles.
  • Sheer: Sheer fabrics like chiffon, voile, or lace are lightweight and translucent, allowing soft natural light to filter through while maintaining privacy. Sheer curtains create an ethereal and dreamy ambiance and are often used in conjunction with other curtains for layering.
  • Jacquard: Jacquard fabrics feature intricate patterns woven into the fabric, adding texture and visual interest to the curtains. These curtains are perfect for adding a touch of elegance and luxury to any room.

When choosing the ideal curtain fabric for your home, consider the room’s purpose, your desired decor style, light control requirements, and the level of maintenance you’re willing to undertake. Once you have determined the fabric type of the curtains, then you can go for the curtain lengths and decorate the room.

6. Hanging Style

Hanging Style

Now you have taken the measurement of the window and also determined the curtain lengths. Thus, now you need to know the right way to hang the curtains to enhance the look of your house. However, there are several common hanging styles, each with its unique characteristics. You can opt for rod pocket curtains that have a sewn-in pocket along the top through which the curtain rod is threaded, creating a gathered and casual look.

Tab-top curtains feature fabric loops along the top that slide directly onto the rod, offering a contemporary and relaxed style. Grommet curtains have metal rings at the top that allow the rod to pass through, resulting in clean, modern folds. Evenly-spaced pleats along the top characterize pinch pleat curtains, adding a tailored and formal touch to the decor.

Conclusion

Drapes are a unique feature in the overall aesthetics of the house. Thus, choosing the right curtain lengths is a crucial step, as this will help create a well-designed and functional space. However, do not leave behind your instincts; they are the real game changer.

Choosing the right curtains and then finding the accurate curtain lengths is a fun activity to revamp the look of your home. Just enjoy the process and be part of this creativity.

However, keep in mind to take the measurement accurately, as anything more or less than the right measurement can make your house a bit off. Just enjoy the process, and feel free to choose anything that you like.